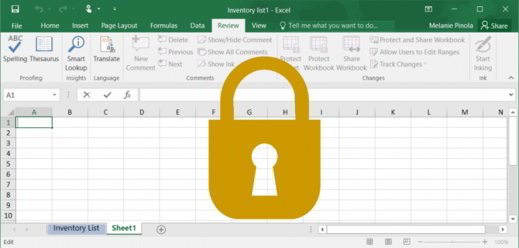
How to lock a cell in Excel. In this tutorial, you will find out the steps to protect the Excel sheets you share.
Did you have a bad day and unintentionally deleted some cells of your Excel file in which you had set up a layout with your invoices? Will you have to redo the formulas and above all waste other hours of work, then? What you can do to prevent this from happening again is to shelter the formulas you have created and avoid unwanted changes.
Lock a cell in Excel and securing your file is the ideal solution to be able to preserve your work and be able to share it with whoever you want.
How to lock a cell in Excel
A wrong and inadvertent click on an Excel sheet cell could ruin all the formula created but also your precious design work. Fortunately Excel allows you to protect Excel sheets protecting the cells from any sudden changes.
The first step to protect some cells in an Excel worksheet is to choose from the Menu View> Normal and create your formula.
For example click on cell A1 and write to us Total, Then A2 put the value 3 and up A3 enter the value 4. Select the cell A4 and go to the menu Formulas to press on Automatic Sum and then Submit, from the keyboard, to see the result of the sum, 7.

In any sheet you decide to create, you can choose to select the cells to edit, and exclude those that contain the formula instead.
By default all Excel cells are locked, if you want to continue to be able to edit the cells you have valued (in your case the cells ranging from A2 to A4) you have to select them, click with the right mouse button to choose Size celle and in the card Protection, remove the check mark on the item Blocked.
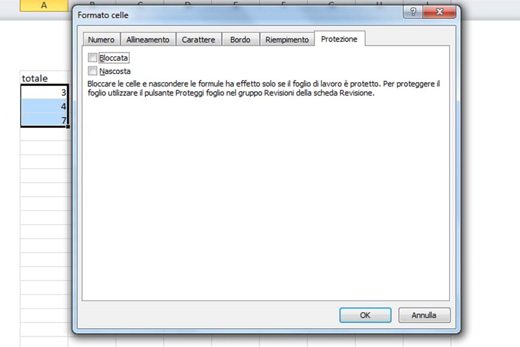
If you want instead lock a cell in Excel, or more than one cell, and that you have valued, you have to select them, click with the right mouse button and choose Size that.
Warning: by holding down CTRL and left mouse button, you can select cells in different positions of the text. Then release the CTRL key and click with the right mouse button on one of the selected cells.
- In the tab Protection, put the check mark on the item Blocked.
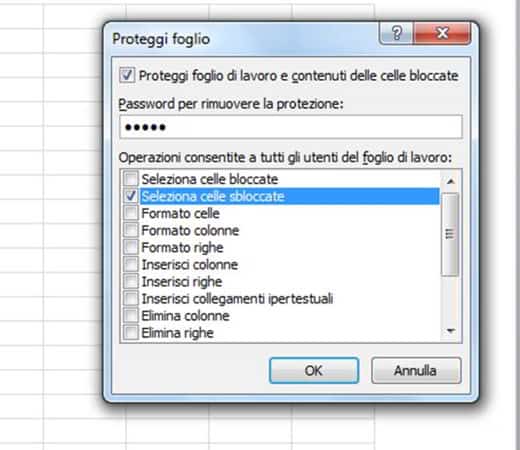
- Then you have to go to the menu and click on Revision and click Protect sheet.
- In the window that appears you need to enter a Password safety and put a check mark on the item Select unlocked cells.
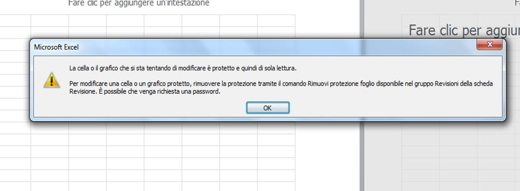
In case you try to change the cells you have decided to protect, Excel will display a error message to indicate that the cell you are trying to modify is protected, and therefore read-only.
How to freeze all cells in Excel
By default, when you protect a sheet or workbook, all cells will be locked. This means that you cannot delete a sheet, much less change its content. You will be able to select cells but not change their contents.
- Click on the menu on revision.
- Click on Protect sheet. In the window that opens, enter a password that will subsequently be needed to remove the protection of the sheet (optional) and check one or more actions allowed to users.
- Check Protect worksheet and contents of locked cells.
- Press on Ok to protect the Excel sheet.
When someone tries to edit one of the locked cells, they will get this error message
Cells can only be unlocked when the sheet is no longer protected. To remove the protection from the sheet you have to log in again on Review> Unprotect Sheet, and in the window that appears type in the unlock password.