Configuring XDebug on Netbeans with Wamp is a process that requires a lot of attention but, following our instructions, easily applicable.
Open the file Php.ini contained in Wamp (path) and paste the following lines of code, paying attention to the presence of the entries:
xdebug.remote_enable = on
xdebug.remote_host = localhost
xdebug.remote_handler = dbgp
xdebug.remote_port = 9000
To use the features dell’XDebug of NetBeans it is necessary to configure the php.ini file again, modifying some specific settings for debugging the created codes.
Activating XDebug is very useful since its features can effectively reduce the number of errors present in PHP codes, already in the development phase.
To perform the configuration it is necessary to edit the file php.ini which you can find at the following path: C:xamppphpphp.ini (or any other directory where Xampp has been installed)
It is therefore necessary to open the php.ini file again with a text editor to make the following changes:
1. Find and uncomment the line (removing the; symbol at the beginning): zend_extension = “C:xampp php ext php_xdebug.dll”
2. Find and uncomment the line: xdebug.remote_host = localhost
Using a more advanced text editor than Notepad allows us to make our changes more easily and above all faster, as evidenced by the following screenshot.
3. Find and uncomment the line:
xdebug.remote_enable = 0 change from 0 to 1 or on or off
4. Find and uncomment the line: xdebug.remote_handler = “dbgp”
5. Find and uncomment the line:
xdebug.remote_port = 9000
6. Finally you will need to save the modified php.ini file.
7. Launch the Application Control Panel XAMPP and restart the Apache server again.
When XDebug is enabled in the php.ini file, you can pause and resume the execution of a PHP application at any time.
When application execution is paused, XDebug is able to retrieve information about the program's current state, such as reading program variable values.
• The user sets a breakpoint on the line where the execution of the PHP source code should be paused.
• When this line is reached, the user executes one line at a time by pressing F7 and F8 with the ability to check the values of the variables.
When starting a debugging session
(from the Netbeans debug menu), a series of debugger windows opens under the main editor window.
To add a new window, choose from the menu bar NetBeans: Window > debugging.
The windows that interest us most at the moment are the following:
<br>• Variables: shows a list of initialized variables, their types and values.
<br>• Watches: shows a list of user-defined expressions with their values.
<br>• Calls Stack: Shows a list of functions called in reverse order. The last called function will be at the top of the list.
<br>• breakpoints- Shows a list of files and line numbers where breakpoints are inserted.
<br>• Sessions- Shows a list of active debugging sessions.
Debug procedure
The following list constitutes the workflow of a typical debugging session:
1. Start the IDE NetBeans, run the project and open the file that contains the source code you want to debug.
2. Place the cursor on the line up to which you want the PHP script to run automatically.
3. To set a breakpoint, press Ctrl-F8 or choose from the menu Debug> Toggle Line Breakpoint.
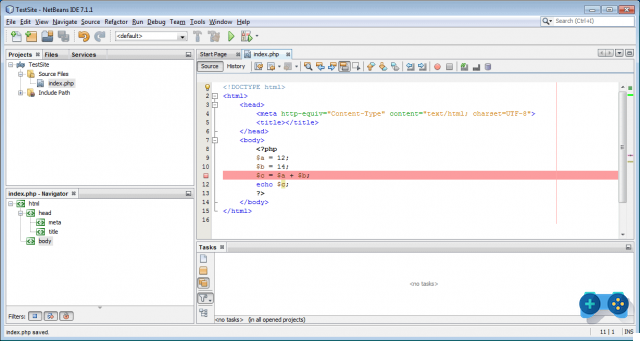
Inserting a breakpoint in the code (line 10)
4. In the “projects” window, by right clicking on the project we can choose to start debugging using the appropriate command. In this way the IDE will open the debugging windows and manage the project in the debugger up to the established breakpoint.
Note: If the current project is set as the main project, you can choose the command Debug> Debug main project, press Ctrl-F5.
5. Switch to the Local Variables window. The window shows all the variables that have been initialized within the current function, their types and values.
6. To view the value of a variable outside the function, move the cursor over the variable. The value of the variable will be shown.
7. To run the program one line at a time between lines within all calling functions, press F7 or choose Debug> Step Into and watch the variations in the values of the variables in the window Local Variables.
8. To pause the debugging session, click Debug> Pause.
9. To continue the debugging session, click Debug> Continue or press the relative button in the bar.
10. When the program reaches the end, the debugger windows close.
Alejandro Crespo Martinez
We are a specialized and passionate team of virtual reality. We have extensive experience in this area. We decided to create ForVirtualRealityLovers to share all our information with customers and users. We have quality information. You can find tips, guides, interviews, top products and much more! If you are curious, enter our site ForVirtualRealityLovers.com and discover the virtual world! 😉
How to create a Windows 8.1 app with Project Siena ❯
Articles related to
Best free burning program
How to compare two tables in Excel
Best free alternatives to Microsoft Word
Handle the Truncation error in importing from Excel to SQL Server 2005
How to fix a Word document with Track Changes
How to convert scanned PDF to WordAdd a comment from How to configure XDebug on Netbeans with Wamp and XamppSoftware
❤️Chi Sleep For Virtual Reality Lovers?For Virtual Reality Lovers we are a team of people who aim to give you all the best information about Virtual Reality. What information do we share?We share everything you need to know about virtual reality, tips, prices, features, guides and much more !. 🤖What are the best virtual reality products?We have the best information section on the best virtual reality products. 
 This work is under a Creative Commons Attribution-Non-Commercial-No Derivatives 4.0 International License. 2021/primerpaso.me X Check out our best articles!
Programs to delete undeletable files
How to compare two text files
Programs to delete unnecessary files
How to download and clone an entire website |