Your notebook no longer wants it to work? Possible causes can be different: errors in the system files or in the Windows registry, corrupted libraries and missing files, accidentally deleted files and so on. Therefore? The best thing to do in these cases, to restore the operating system to maximum efficiency is, after making a backup, restore using a disk image you created or use the supplied software. With this second solution restore a notebook to factory conditions, that is, as if it were a newly purchased computer, it is possible. How to do it? Don't worry, with the tips I am about to give you you will understand how to reset a notebook in complete safety in a few simple steps.
Formatting a PC often causes a lot of anxiety especially for less experienced users both for what concerns the installation procedure and for what concerns the possible loss of important data.
How to reset a Notebook

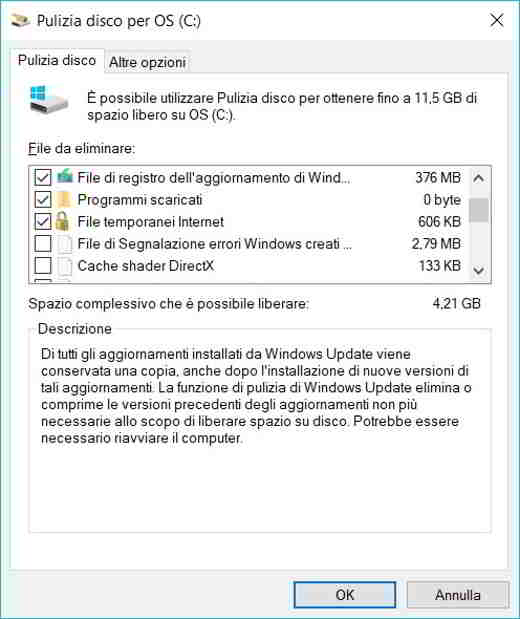
Before proceeding with formatting or restoring the operating system it is always best to make a backup of your data. In addition to those made available by Windows, there are those installed directly on notebooks by manufacturers or those that are on the market. Finally, if you really want to adopt a simple and painless method, you can use a pendrive of the size you think is most appropriate for the amount of data you need to save.
If you have not bought a notebook for long, you will know that recovery CDs / DVDs are no longer supplied with the notebook. A policy undertaken by all manufacturers except Asus which prefers to leave the user the ability to create a set of recovery discs as soon as the laptop starts up for the first time.
Fortunately, the manual provided with the notebook explains in detail the procedure for carrying out a Recovery of emergency through a key combination at startup. This is possible thanks to a hidden partition of the hard drive that contains a backup image of the system itself at the time it was shipped from the factory.
To access this function you need to know the procedure for the notebook in use, which naturally changes from brand to brand. For each notebook, once the reset procedure has been started, through the factory software, just follow the required steps.
To reset an Acer notebook, just type the entry in the Start Search field Recovery and start the suite Acer eRecovery Management. Once the program interface is open you will need to click on the Reset system to factory defaults button.
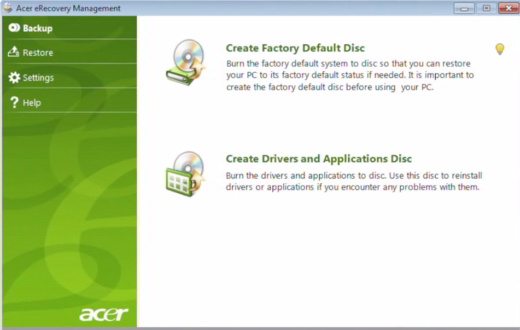
A message will warn you that the PC will be restarted and subsequently reset. Press on Si and then on the button Start.
To reset an HP notebook, just type in the Search for field Start, Recovery and start the program Recovery Manager. In the column I need help right away seleziona l'opzione Restoration di System to begin.
You will be asked to confirm the reset. Select first Si and then click on NEXT. Your PC will reboot and you can back up your personal data before the reset. Then click on NEXT. The process will now automatically find the recovery partition and start the process. When finished it will start the restore process.
To restore a notebook Sony, just type in the Search for field Start: go to care and then click on Vaio Care.
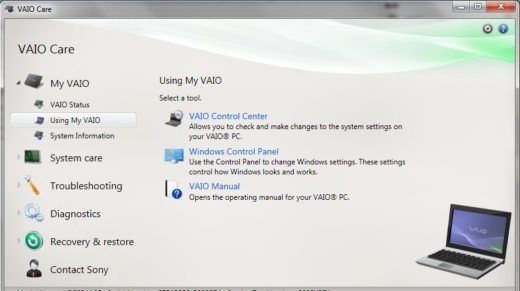
In the column that will appear on the right of the screen, click on Advanced Tools. At this point the screen will expand: then click on Recovery and recovery to start the operation.
To bring up a window that will warn you that after the reset all data on the PC will be deleted, press Restore computer. Click on Si, your computer will restart and begin the process.
On reboot click on Wizard start recovery. If you have saved our data click on Ignore recovery, otherwise select, Si to start the recovery. At this point choose the files to save before restoring. Click on Next to start the process.
As for other Notebook manufacturers you should find yourself for:
- ASUS – ASUS Recovery Partition
- Dell – Dell Factory Image Restore
- Toshiba – Toshiba HDD Recovery
- Lenovo – Lenovo Recovery
How to restore a Mac
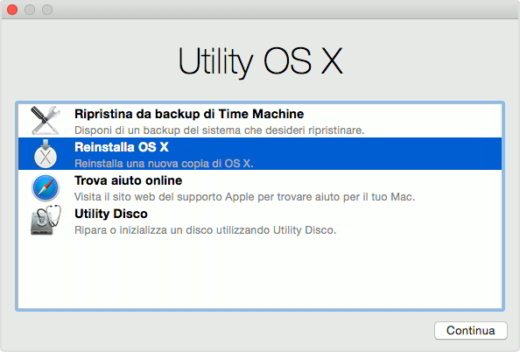
If you want to restore a Mac you can make use of the tool Recovery OS X. You can access it by holding down the buttons at startup CMD+R then select the disk Recovery HD.
A screen with a list of choices will appear:
- Restoration starting from a Time Machine backup;
- Reinstallation Mac OS X;
- Request online help from Apple staff;
- Access to Disk Utility.
To restore a Mac choose the last item Disk Utility I awarded Continue.
In the menu Utility-Disk move to the Initialize item and choose the format Mac OS Extended (Journaled), give a name to the Hard Disk and then press on Initialize. Once the HD has been initialized, quit Utility Disk and select the installation from a backup of Time Machine or reinstalling the operating system from scratch.
In the first case you can restore a Mac from a Time Machine backup following the instructions on the screen. At the end, everything will be set as in the factory state.
In the second case you can restore a Mac reinstalling da zero il sistema operativo OS X or by reloading OS X from Apple servers with fast ADSL connection or if you have a DVD or USB stick with OS X present, you can select Reinstall OS X and follow the installation procedure to the end.
In case your Mac does not have Recovery OS X you can download it from this page.