A guide to solving the missions and finding the "Jackal".
Premise
This solution is intended to be a synthetic guide to complete the individual main and secondary missions in a simpler way, knowing in advance the position of the objective. He will not be able to say what to do at any time this because FAR CRY 2 it is of the free-roaming genre and therefore by its nature the player can move where he wants and do most of what he wants.
The main missions are consequential: it will be important to finish one to unlock the next.
The secondary ones are not important for ending the game and can be not undertaken.
Let's start with the first Goal.
Goal 1-9
Objective 1 // Get out of the city
The game starts our character suffering from malaria. He will have to get out of the city in order to better understand what is happening.
Before getting out of bed, he meets the jackal, who shows him his intentions and then vanishes. Now you need to follow the instructions to exit the building. A street fight is taking place here. In the end, it is inevitable to be shot dead and then saved.
OBJECTIVE 2 // Get weapons and syringes from the first aid kit (medkit) from the wall
The guy who saves you tells you a little about what the situation is like and hires you for a first mission. It provides you with weapons and medicine.
Grab the assault rifle and flamethrower on the table, and use the first aid kit on the wall.
OBJECTIVE // Open the hood and fix the car.
Outside the building, open the hood of the yellow car and fix the problem.
OBJECTIVE 4 // Kill the scouts in the camp and unlock the first shelter.
Nothing complicated here. Using the car, head south following the gps track and map. Remember to park your car in a quiet place. Kill the two enemies and take control of the shelter. This house will be used to carry out rescues, to rest by running the time and to use the crates to put down weapons and take more. But this last activity can be unlocked much later by using diamonds to buy chests.
OBJECTIVE // Use the cot in the shelter.
Go inside the building and follow the sleeping tutorial. Choose any time but be careful; when you wake up there will be the sun or the night depending on the time set on the alarm clock.
OBJECTIVE // Reach the observation point and the scout camp.
Return to the car and drive south where the place is marked on the map. Again, leave the car at a good place to drive cautiously. Continue on foot along the high mountain road that overlooks the field below. While viewing the map, use the monocular (by pressing the same button for the viewfinder when you have a weapon).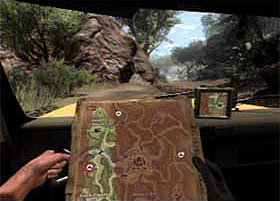
OBJECTIVE // Free the prisoner from the perched building at the armed camp.
Crawl (in the sense of entering without being seen) or Attack the camp. Follow the red mark on the map to find the right spot where the building is. There is a hole in the wall on the west side which can be used to sneak inside the place. Inside the palace, open the wooden warehouse door to free the hostage.
OBJECTIVE // Return to the slaughterhouse and satisfy Kankaras.
Don't worry about freeing the hostages, the important thing is to have unlocked the rescue. Even if it stays inside, you go out and head to the slaughterhouse. To do this, go back to the car, use any unit and way back to get to the slaughterhouse.
OBJECTIVE // Locate the diamonds using the flashing light on the GPS.
You are informed that the payment is made with diamonds. Outside the slaughterhouse, a briefcase containing the first loot awaits you. When you are on foot and the map is open, a small green light turns on the GPS like a radar. If a diamond is close, the light will flash. If it's directly ahead of you, the light stays steady. If you are very very close, you will hear a low pulsating noise. Once the search for the diamond is completed, a tutorial alerts you to the first case of diamonds (diamonds worth 10) inside a train car, just outside the slaughterhouse.
Goal 10-17
OBJECTIVE // Use the shop computer to purchase new weapons.
Drive down the streets until you reach the place. The shop is marked on the map, it is located near a bar. Inside the shop, use your computer and browse the list of weapons and upgrades. Using the diamonds collected earlier, you can proceed to purchase at least one of the weapons that are available for now. Buying a weapon means that they are always fresh, in good condition and will be available at any time in the armory (located near the shop).
OBJECTIVE // Go to the armory to buy new weapons.
After purchasing at least one weapon, exit the shop and enter the armory warehouse which is right next door and take the purchased weapon.
OBJECTIVE // There is someone at Mike's Bar who can offer the medicine.
Go across the street and find the main door in the bar. Talk to the person who was released and then talk to the reporter, who is sitting at the table in the corner. Get the audio tape he offers. Talk to the guy standing in the shadows. He will help you in time of need, and will unlock a save bonus (free resume).
OBJECTIVE // Go to the church and give the ribbon to Father Maliya.
Exit the bar. Grab a vehicle, drive around town in the middle of the region. Enter the church through the main door on the north side. Talk to the priest, give him the ribbon, take the malaria medicine in return and use it to avoid the disease for a longer period of time.
OBJECTIVE // Get out of the church to find a new mission.
Exit the church through the main door. Once you have passed the scenes of the introductory tutorial, the game will give some indications on how to use the map and on the search for jobs that can be done. One way to start is to visit the UFLL headquarters (called High Quarter, in acronym HQ), a building on the west side of the city. Go through Check-in with the guard in front of the entrance and go upstairs to where the boss is.
OBJECTIVE // Destroy the foreign commando's weapons supply. (UFLL)
Leave the city and go east. Friend Missions are new jobs that are meant to be completed before finishing the main missions. If you want him to be present in these missions, you need to answer the friend who called you. The friends' mission here is to force an informant to send the wrong coordinates for the commando. This informant is located in a mansion in the northwest, on the second floor of the building marked on the map. Through a difficult struggle to reach the place, talk to him to get the coordinates to transmit. Look for a truck with a radio in the back and shoot the radio to make it explode. If the friend needs help later, just follow the symbol marked on the map to find the enemies that need to be wiped out.
OBJECTIVE // Go to the oasis and score gold for the UFLL. (UFLL)
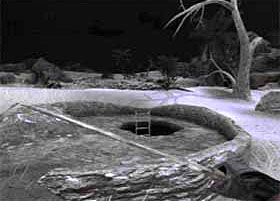
Gold is found in an oasis in the middle of a desert. The friend's mission is to kill a king first and take his ring. For the king, go up to the second floor of the fortress where his office is and kill him. On one side there is the entrance to the fortress to the south along its walls. You have to be sure to take the ring out of her body afterwards. Then, give the ring to the prince at the next marked location. When you have the gold, drive across the desert sand to the oasis. There is a hole in the earth in the center of the place. Climb down the ladder into the crypt, and check the gold chests inside to tag them. Afterwards, the help of the friend, if necessary, is used to kill a wave of enemies when it is time to return to the surface.
OBJECTIVE // At the railway yard, destroy the tanker car. (APR)
The tanker car that is to be detonated is in a train in the shipyard to the northwest. The friend's mission here is to kill some officers on a ranch to the east. It is the first floor of the building on the ranch. At the train in the yard, the tanker car is on the tracks between some of the blue cars near the train. Shoot with bullets or the machete to create a gas leak and then with the use of explosives it will create an explosion. For the friend mission, also proceed further northeast along the tracks to the marked point and take out as many enemies as possible. Watch out for vigilance outside the construction site, they will obstruct your roads.
Goal 18-23
OBJECTIVE // Destroy the compressor in the garage. (APR)
The compressor west of the city must be destroyed. The friend's mission first is to steal a calendar information. Look at the construction site to the northwest. The file is located on a desk inside a building in the center of the compound.
As for the main goal itself, destroy the red marked compressor tank inside the building, on the south side of the area. For the friends mission to follow, head northeast to the point marked on the road and kill as many enemies as possible than you encounter on the way to the end point.
OBJECTIVE // At the top of the GOKA Falls and kill Gakumba. (APR)
The UFLL boss is on his mountain retreat. To get there, take the forest path north of the place marked on the map. Or, from The Boathouse to the nearby river, cross the river and climb the winding mountain path to the south and then cross the bridge that passes behind the gorge. The UFLL head is located inside the single storey building. There are a lot of guards, of course. After killing him, exit the area.
OBJECTIVE // Have a conversation with Reuben at the lumber field.
After the UFLL boss is killed, the reporter will ask for a meeting. Go to the lumber yard and enter the building marked on the map. There are no enemies to worry about in this area.
OBJECTIVE // Meet friends at Mike's Bar, or answer Father Maliya's request at the town church.
The reporter talks about an approaching raid on two places at the same time. Your friend needs to choose a location to contribute to the defense. The choice will not be very easy, but he must make a decision and proceed with the second sector.
OBJECTIVE // Defend the Mike's Bar area.
For this mission, watch out for enemies appearing outside the bar when approaching Mike's Bar. Go into the bar through the main door as usual and push the fridge to lock the same door. Enemies will approach from all sides, shooting through the windows. If your friend is not blown away, a powerful explosion will surprise him. Even if you lose your friend now, it doesn't matter, because that's part of the story.
OBJECTIVE // Defend the Church.
For this mission, go back to the city, and enter the church. Talk to the priest, and then push the toilet to lock the hidden door. Enemies will approach from all sides, shooting through the windows. If your friend is not blown away, a powerful explosion will surprise him. Even if you lose your friend now, it doesn't matter, because that's part of the story.
Goal 24-30
OBJECTIVE 24 // The shelter.
There may be an opportunity for the call from your friend to jump out of a truck full of corpses, down a road through the middle of the desert. Follow the direction of the wind, and wander through the desert until a hut approaches.
OBJECTIVE // Kill Prosper Kouassi and his rally troop.
Lo Jackal it shows itself once again and runs away as in the beginning. Another friend appears and offers you as a job to kill the APR boss. Your friend has lost his rifles, but he can find an assault rifle, a pistol and a mortar in the hut. He can also return to the armory warehouse to return with other weapons. When you're ready, head to the rally head, southwest of the city. Take advantage of the fact that there are a lot of wrecked cars along the way, which can provide help to cover up like with big rocks. There are very strong armed positions from this area.
OBJECTIVE 26 // Appointment in Voorhees Sefapane.
Turn southwest on your way through the open desert. Follow the signs for the route that remains further south. There is a loading point in the southern region. Continue to the marked building in the small village. Talk to the new UFLL boss and learn that it takes a lot more action to be considered even more. Your reputation is very important, remember that.
OBJECTIVE 27 // Meeting with the owner of the boat on the island of the Jackal in Lake Segolo. (UFLL)
The next task is an escort job for the vessel providing weapons. Go to the city in the center of the region, using the bus as a shortcut. From there, take a boat, and travel across the water with the boat, which is parked in a stream near the island. Find the door to the bridge and talk to the captain, who will become a new friend.
OBJECTIVE // Defend the boat until it lands in Porto Selao. If the boat breaks down, repair the engine.
Search the bridge. Kill the enemies on the rocky banks on either side, and fight against the enemy boats that try to intercept you. There are weapons and ammo to be found near the ship, including three cannons mounted towards the front, so don't worry about running out of ammo. The boat's engine is located in the middle of the bridge, near the foot of the stairs leading up to the bridge. If the boat is stopped, kill all surrounding enemies first and then fix the engine.
OBJECTIVE // Go to the clinic and speak to Doctor Obua.
With the boat anchored, go to the clinic in the northern half of the city. Enter through the main door on the south side. Talk to the doctor to give him the warning that the ceasefire will be at least temporarily in the city.
OBJECTIVE 30 // Escape from Porto Selao.
A new friend will say that going out through the front door is too risky. So, use the back door, relative to the room where the doctor is. To escape the city, head back south. Stay away from the streets as much as possible, and find a car to escape faster.
Goal 31-40
OBJECTIVE 31 // Appointment with the boat and eliminate the attackers.
The friend returns to the boat and has encountered more difficulties. The boat is on the other side of the lake, near the area with the bar (between the shop and the weapons). Take a boat and cross the waters to it, or use the bus for the journey even faster. Once you get there, watch out for the enemies. Afterward, talk to your friend at the ship's deck.
OBJECTIVE // Destroy the oven in the Dogon village. (UFLL)
The goal is a large oven in a mountain village. The friend's mission that you are given is to kill another dude first, so that the friend can check his transport documents. To find this man, go to the outpost marked on the map. The oven is located at the highest point of the mountain where the village is located. Move around buildings and mountain tracks to find it. Shoot the explosive tanks next to the oven to roast it. If the friend needs help later, keep an eye on the place marked on the map, and kill the many enemies in the small village.
OBJECTIVE // Go to the Polytechnic and kill Seth Uniya in his office. (UFLL)
The man to be killed is an instructor on how to make bombs. For the friend's mission, there is also the task of stealing an information file. This file is on a table in a shack marked on the map in the middle of the buildings. After the capture, proceed with the search for the instructor at the boarding school. He is inside back building in the corner. Threaten him to provide the coordinates, and then hit his face. For the friend mission, go to the next marked location and help the friend at an airport. There is a very small passage through the mountains to the east of this airport which can be used to get there quickly.
OBJECTIVE // Free the hostage from the facility located in the Sediko Dogon. (UFLL)
Rescuing the hostage is another job opportunity. The hostage is initially placed in a village hut, then on the second floor of a building. Climb the staircase of the building from the inside to exit this place.
OBJECTIVE // Go to the ship full of weapons and kill Yabek. (UFLL)
This mission involves another ship, but this time it's about destruction rather than defense. The friend's mission is to find a fuse so that the friend can use it to craft a bomb. Drive past the point of the ruined site marked on the map, and take the fuse lying on the ground. Then, give the fuse to the friend in the marked place. The meeting is on the bridge just above the boat, and can be reached by taking the road east of the airfield. After the bomb is set, follow west again, before the bomb detonates the bridge, causing rubble to collapse down on the boat, now swim to the target. Then, avoid or kill the enemies that come to search. If your friend doesn't finish the mission, he can simply board the motor ship and navigate to the goal via the old butchery street.
OBJECTIVE // Go to the village dental clinic and destroy the nitro tanks on the plain. (APR)
The target here is a truck with nitro tanks. You can simply explode with a grenade. However, the friends mission here involves a much more careful approach than usual. First, choose a parts package at the post office. The package is a simple cardboard box on one of the shelves. The truck is in a shed in the clinic area. Without exploding it, try to kill all enemies nearby, and then repair the truck as usual. Once the repair is done, get into the truck, and start driving towards the village to the northwest. The road isn't too long, but you need to be sure to get out of the truck and hit any enemies that haunt you, in order to reduce the risk of getting the truck exploded. Enter the garage from its west side. Once inside the garage, your friend will appear with a tamper to the electrical panel. Go to the back of the truck, and use the tanks to break the opening. Then, go out through the door to the east, and head to the marked place to the north. Get ready to kill lots of enemies that will come and attack you.
OBJECTIVE // Destroy the transmitter power generator in the Weelegol village. (APR)
The object to be detonated today is a generator of a radio transmitter. For the friend's mission, the task is to eliminate a propagandist minister. It is inside a wooden shed by a compound side, as indicated on the map. Swim into the place, work up past the buildings, and kill him. Then, to the abandoned village chief in the southwest. Go up the hills to the back, and talk to the DJs to have him read a message. Then, proceed further to the dead end, where the antenna with its generator is yellow. Destroy the explosives equipment. Afterward, leave the country, and head to the marked ambush spot in the north, to a guard post. Kill the enemies there to complete the whole job.
OBJECTIVE // Go to the diamond mine and steal TNT dynamite, and break the pipe at the construction site with TNT. (APR)
It is a two-part mission. First, go to the top of the mine and steal the package of TNT marked with sticks that is in the shack.
After this, the friend quest associated with this will become available. It involves destroying a "cut-off" safety system located east of the site construction, before detonating the pipe. Look for the red valve inside a metal shed at the marked spot. Use grenades or other explosives to destroy it. (Due to a glitch, there will be no option to save after this point, later it may be useful to save the game safely from a shelter.) When you are ready, go to the site build. Follow the signs, place the TNT on the large side of the red tube.
Run away and let the explosives roast in the open. To conclude the friend's mission, go back to the now flooded mine, and stop the enemies attacking the friend. (Due to imperfections, falling into the water here can be a bad idea, as your friend is unable to climb any of the walkways above the water again and therefore could not help you.)
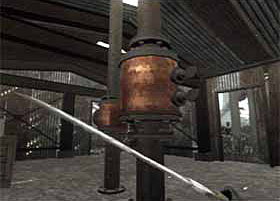
OBJECTIVE // Deliver Tambossa letter to Mbantuwe at the brewery and collect the diamonds. (APR)
The APR chief wants some kind of deal with the UFLL chief. Go to the location marked on the south shore of the lake. Enter the marked building, and go up the stairs to the second floor. The UFLL boss is dead, but the diamonds are still in the office, on a red sofa. Grab them.
OBJECTIVE 40 // To escape from prison.
Your friend wakes up inside a smelly prison cell, with the size of the Jackal printed on his face. Start the escape by looking at a different visual inspection of the section of the walls, where the color has faded and where there is a small hole. Open it with a kick. Your friend automatically retrieves his machete and medicine, along with the grenades. Check the map to see where to go. Head northwest to get out of the prison, and then continue along the dirt path to the marked spot along the roads. Swipe through enemies, or steal their weapons through battle.
Goal 41-46
OBJECTIVE 41 // Appointment in Voorhees Sefapane.
After leaving prison, your friend gets a call from the new UFLL boss for a meeting. Take the way back to his office. Use the bus for a quick connection if you wish.
OBJECTIVE // Go to Dogon Sediko and kill Oliver Tambossa.
The next step is to eliminate the APR chief. Enter the town from the west. Crawl into the building marked from the southwest which is easier. Climb the ladder of the facility to the second floor, and take out the APR boss.
OBJECTIVE // Go to the TaeMoCo mine and kill Voorhees and his helper.
The guy back from the start of the game now wants his superiors out of his way. Go to the southwest mine to find the objectives. The two are within a single hut office floor. Crawling around in the building from the west can be easier. If your friend decides to kill only one of the targets, there will be an additional choice to side with the survivors, at least for now. The choice is not going to be very, very nice, but she has to make a decision and leave the appropriate man.
OBJECTIVE // Meet Reuben at the Marina bar.
The reporter asks for another meeting as before, this time at the bar to the south. Take the bus to save time. Inside the bar, talk to the reporter. Then, talk to the guy sitting near the front door.
OBJECTIVE // Go kill Greaves and his aide in Sepoko.
This is similar to the previous double hit. The targets are inside the compound to the northeast. There is a hole in the wall along the north perimeter that can be used to enter there. The two are in a single office floor of the hut. If your friend decides to kill only one of the targets, there will be an additional choice to side with the survivors, at least for now. The choice is not going to be very, very nice, but she has to make a decision and leave the appropriate man.
OBJECTIVE // Find Reuben in the airport hangar.
Like the previous mission, the reporter is investigating, and his journey to the airport is not without difficulty. He hid inside the marked shed. Kill the enemies in any way, find the door in the hangar, and talk to the reporter.
Goal 47-53
OBJECTIVE // Go to the prison to meet the Jackal.
The reporter tells of a riot in prison, the same place where your friend was previously. The Jackal could be the one who caused the riot, so why not go there and try to meet him? Now is also a good time to stop understanding the reasons for the war. Enter the prison via the same path used before for the escape. Open the door to go inside the prison, and find the Jackal in the center of the courtyard. Turn to him, and follow him as he moves. Then exit the prison, through the east door.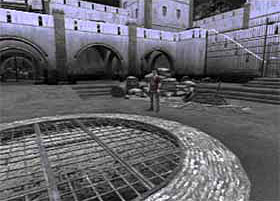
OBJECTIVE // Go to the LZ and recover the diamonds stolen by the gun dealer.
From the east gate prison, move to the southeast area. This region is pretty much the end of the game, so be prepared to save as needed at any time. When ready, continue through the valleys and use a safe haven along the way to save and refuel. Reach the second shelter, it is on the top of the rocky paths and look for a natural rock bridge that crosses the ravine. Proceed to the landing area to find old friends. They have apparently changed the way they are hostile towards your friend. If they want to be liquidated, that's their goddamn problem. Find cover, like the crates around the outside perimeter, and blow up all the former friends. It will take a lot longer to rage and kill than usual. After killing them, get the diamonds in the center of the area. Now make a safe save in the last refuge visited.
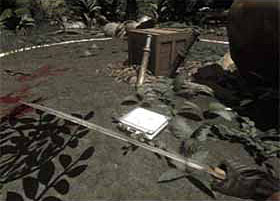
OBJECTIVE // Go to the jungle bivouac and kill the commanders of the two factions.
Go to a dead end where the survivors are faction leaders. Rest along the top of the trails, along the outer edges, and make your way up to their shack. Assuming your friend hasn't broken the usual ceasefire, he can walk around this space without problem, which allows him an easy approach to the two unsuspecting goals. Stand by the ledge in front of the shack, throw a bunch of explosives in the faces of the faction leaders, and then down the ravine and shoot like hell.
OBJECTIVE // Go to the Jackal's Hut and deliver the diamonds.
With all other key characters dead, your friend can end his business with the Jackal. Go to his shelter, and here deliver the diamonds to him.
OBJECTIVE 51 // Get the battery or briefcase.
The Jackal wants to bribe civilian-leased border guards to reach some refugee camps, and wants to blow up cliffs to block the enemy forces that haunt him. There isn't enough time for him to do both, so he needs your friend to handle one of his tasks. Choose as a job to take the battery to detonate, or to take the diamond case to do the corruption.
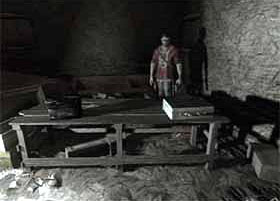
OBJECTIVE // Go to the canyon and detonate the dynamite with the battery.
For this mission, take the winding road behind the hut. Kill many enemies along the way. At the end of the winding path, use the crate of dynamite. BOOM!
OBJECTIVE // Go to the Border Patrol Camp and give the briefcase to the Commander.
For this mission, continue north past the hut, and follow the rocky path. Open the door at the secure border station. Give the diamonds to the man standing next to the desk.
Congratulations ! You have finished the missions.


