A brief guide to installing a portable mp3 player on sources without AUX input.
Introduction.
The widespread diffusion of modern digital audio formats and the growing need to listen to our favorite music everywhere, have pushed the leading multinationals in the sector to design and market an ever-increasing number of devices compatible with these standards. Unfortunately, the stock sources of some modern vehicles do not support Mp3, WMA etc. nor do they have audio inputs for connecting external sources.
At this point there are two solutions: the first is to replace the standard source with a latest generation one with a considerable economic expense and the imperfect integration of this in the dashboard of our car, without counting the possible loss of the controls. behind the wheel.
The second, cheaper, is the one we are going to illustrate in the following article.
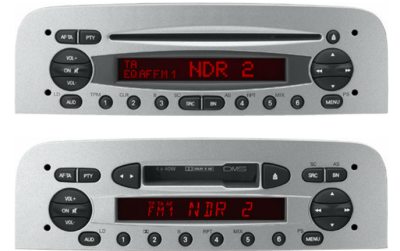
By following this guide step by step, we will see how to install your Mp3 player on Blaupunkt car radios, in particular the standard ones mounted on Fiat, Lancia and Alfa Romeo (the procedure is almost identical even for different radios) without AUX input.
Used material
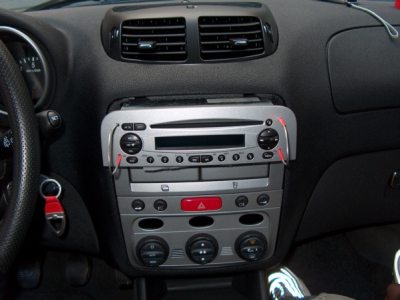
The source taken into consideration cd or cassette (Blaupunkt BP937) is the one mounted as original equipment on Alfa Romeo 147 cars.
Before starting work, it is necessary to obtain the necessary equipment to perform this operation:
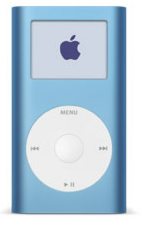
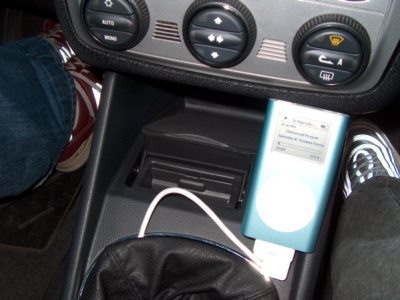
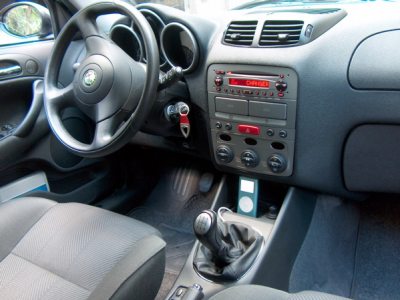
# an Mp3 player: in our case the choice fell on the very popular Apple iPod Mini
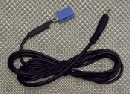
# A cable that at one end reproduces the cd changer connector (of which you will find a diagram with all the connections below) and on the other side an audio jack to be inserted into the headphone jack of our external source. This cable, also produced and sold by Phonocar, is easily available at any car audio supply store.
# (Not essential) 12v power supply to be connected to the cigarette lighter socket, (to avoid being on the road with flat batteries and therefore deprived of our favorite music)
For the player used there is a wide range of accessories that are right for us.Our choice fell on the charger produced by Belkin, an accessory of excellent workmanship and perfect integration with the look of our Ipod mini.
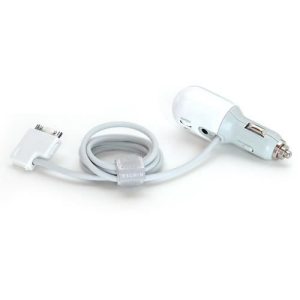
The Belkin accessory has an internal circuit that further amplifies the signal and using the digital FireWire (or IEEE1394) connection allows us to avoid the loss of audio signal.
Let's get to the heart ...
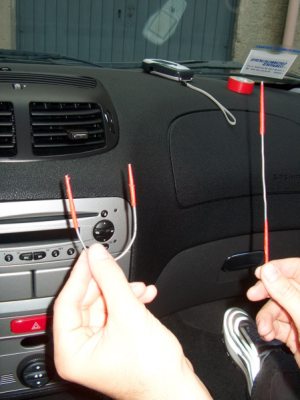
Once we have found everything we need, we get to the heart of the operation. First we disassemble the car radio, this is a very simple operation: just get some metal rods with a diameter slightly smaller than that of the holes present at the four corners of the front panel (wire, screwdrivers or the charge of 4 bic pens will go anyway very well). By inserting everything into the four holes, the auroradio will detach from its supports and will come out very easily.
Once the car radio has been extracted, we will find the connector that interests us on the back.
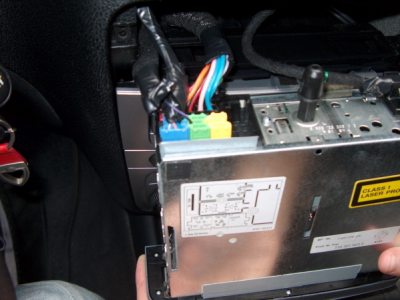
Having extracted the fake blue connector, we will position the end of the same color of the cable that we have obtained in the vacated housing. Once this is done we will take care to pass the other end of the cable (the one with the audio jack) in the best possible way and avoiding folds and dangerous contacts with exposed wires up to the passenger compartment and at the point most convenient for us to connect with ours. reader.
Before reassembling everything, it is good to carry out a test by enabling the Aux input:
(the procedure is that for the car radio we use, in case of different car radio consult the manual supplied).
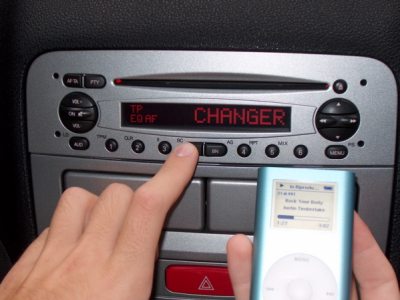
Turn the car radio off and then on again by pressing and holding the SRC button. If the operation is successful, the message “CHANGER” will appear on the display. Once this is done, all that remains is to turn on the MP3 player and enjoy our favorite music.
In case we have decided to use the 12v power supply, a female cigarette lighter socket is required (available in any auto supply store).

For a true perfectionist job it is good to connect the Belkin charger directly to the car radio using the PIN 16 (+) - 17 (-) of the BLUE connector (as shown in the diagram); in this way, in addition to not having annoying wires around the passenger compartment we can have the convenience of powering the charger, at the same time as the source, without running the risk of discharging the car battery.
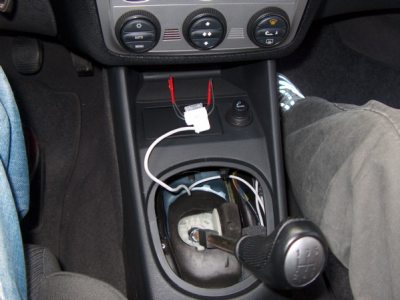
At this point we just have to connect 2 wires in the free spaces of the connector corresponding to PIN 16-17, lay the cable passing it behind the car radio and the climate control block, in such a way as to make it come out in the gearbox cockpit (removing the headset we will see that there is enough space to house the charger) and connect the two ends to the female cigarette lighter socket (be careful NOT TO REVERSE the polarity).
Once again it is good to check that everything has been done correctly: by testing the system more than once by switching the machine off and on again, making sure that no wires have been left uncovered.
Conclusion.
In conclusion, some recommendations to ALWAYS follow when carrying out this type of operation:
-Always disconnect the (-) "negative" battery terminal
-Leave a door open to prevent the central locking from inadvertently tripping and leaving you out of your car
- Insulate the cables well with sheaths or quality insulating tape.
Good job and good Car Audio to all.
For any questions or clarifications you can use our forum
Article published in Hirc on October 19, 2004 by the same author.