Before starting with this episode, I invite you to subscribe to ours telegram group to have a direct relationship with the editorial staff. This way you can do any questions you want and clarify any doubts, as well as stay updated on all the news from the videogame world.
In the last part of the guide we dedicated ourselves to backtracking and exploring the Screaming Cliffs, saying goodbye to Pulveria. If you want, before continuing you could get off the elderly caterpillar to receive the rewards that are due to you. In addition to the usual Geo, if you have followed the guide you should also receive a Fragment of the Mask and the amulet Larval Chant. This takes up a notch and recharges a small portion of souls in it when you take damage - quite useful.
When going up to Pulveria, instead of using the up key to climb along the chain, do it manually using the claw. This way you will find one hidden cave containing a Hallownest Seal.
In the city now another house should be open, that of Bretta. Here you can find the sleeping character, another one Fragment of the Mask and her diary. Reading the latter we discover how the poor woman felt to be saved and how much she has now fallen in love with our knight. Gerontias will also have something to say about her. However with this fragment we get to four and we get therefore one more mask, that is an HP.
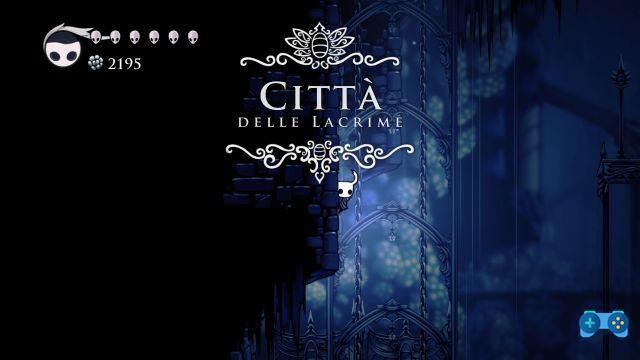
Towards the capital
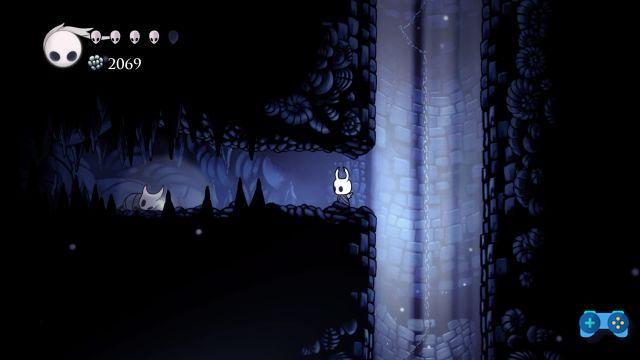
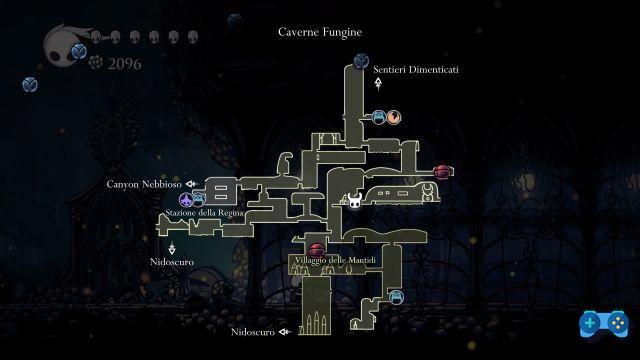
Now is the time to leave for the Queen's Station and from there return to the place where we met Hornet, in the Fungal Caves. A challenging platforming phase awaits us to reach the other side of the toxic lake.
Quickly go up to the first platform using the claw and quickly take out the Micoistrice. Soon after, let yourself slide along the wall and use the dash to get to the other side. Then sprint over the brambles and do the same thing again. At this point high above you is there a hidden area with a black statue that allows you to recover souls and be able to heal you. To continue, let yourself fall and use the dash before touching the brambles, until you reach the small platform below. Here a lever will open the first half of the bridge, actually acting from checkpoint.
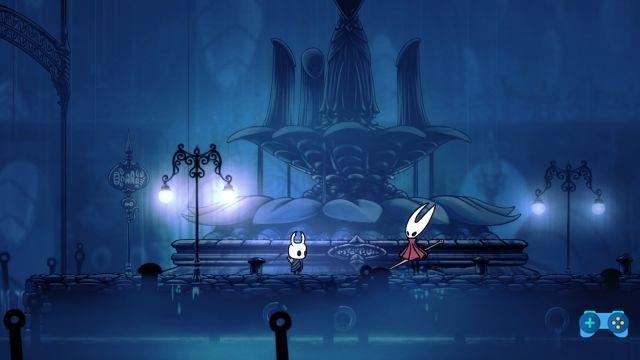
Now climb up and drop again, but this time sprint to the next wall and immediately claw back up, zigzagging to the platform. At this point it is done, you have reached the other side of the lake. Here, after operating the lever, one knight statue awaits you. This, identical to the one worn by False Knight, has a cavity in which to insert an object. We can finally use it Citizen Coat of Arms, that the False Knight had dropped us.
The city gate will close immediately behind us once we pass, but before continuing into the next room, here it is a secret passage. Climbing up the right wall, before entering the corridor, you come to a room at the top. Up here we can find a block of Geo and a point where the floor is destructible. In the future we will be able to open a passage.
You can hear the rain
Continuing in the next room pay close attention to the fearsome Ventrelumie, bats that will launch towards you to explode. Just try to dodge them! A little further on there are two Wrecks and a platform that allows you to go up. From here for now the road is blocked by a gate that we will open on the other side, later.
We then continue straight ahead. Pay attention to the Sentinel wreck, enemy armed with a sword. Fight it by giving it a shot and sprinting back and you will quickly get rid of it. After passing another Ventrelumia and a Rhino Wreck we can continue in the lower room, where finally the wonderful soundtrack of the City of Tears will accompany us.
This area is full of Sentinel Wrecks, be careful! We must continue downwards, while from these huge windows we can see the pouring rain, and enjoy these melancholy notes. When you encounter an elevator, watch out for a side path as it descends. Here you will find a sign that says "The great doors have been bolted. Nobody will enter. Nobody will come out. " Be careful not to throw yourself on the roof of the elevator: it is sharp.
We reached a bench, where the usual Quirrel he is resting. Our friend will tell us about the capital and its mysteries. He will also explain to us that the city is built in a huge cave and the rain comes from a large amount of water that is located above. A lake, as we will find out later. Finally the explorer will tell us to watch out for the empty shells of the sentries patrolling the city: they still remember their training.
From this bench we continue downward. In the room below there are some wrecks and by going around the central elevator we can recover a big block of Geo. Going down we have officially reached the City of Tears!
Enhanced spines
Now we follow the sign on our left that indicates the famous blacksmith previously quoted by Quirrel. From here we come to a room with various platforms and enemies, and dark water at the bottom that doesn't kill us. We reach the other side of this room by killing the various Wrecks and Tormentottere and climb up, following the sound of the master at work.
Once we enter to talk to this peculiar individual, he answers us casually mistaking us for someone else, who knows who. Speaking to him he defines himself as the Nail smith and he will tell us that our sting is in pitiful condition. To reforg it and make it much more lethal, he asks us in exchange for 250 Geo. Pay him of course to watch the short forging movie. The interesting thing is that you are actually opening the inventory our sting has changed and now it is "pointed".

To further enhance our weapon, the blacksmith asks us to bring him a Terreo mineral, which we will get later. Returning to the previous room we can immediately test our new power on the enemies present here. For lovers of parameters, ours damage increased from 5 to 9, although Hollow Knight prefers not to reveal the numbers hidden inside. At this point we go back to the elevator room we came from.
This area looks a lot like the previous one, but evolves much more in height. To switch to the upper side use the elevator and jump while it is going up. Here you will meet a new and dangerous enemy, one Winged Sentry. Hit while being careful of her attacks and, once killed, move on. On top of these platforms you can find a Hallownest Seal, defended by another sentry. We will soon be able to sell these items.
Opulent collectibles
Continuing into the room on the right from the entrance at the top we will meet one Brutal Sentinel. This enemy has three attacks: a charge, to be dodged by jumping, one to jump, and a slash from above, both to be dodged backwards. On the right there is an elevator and a strange sign that tells us to continue down. We go down and on the right we will find a new NPC: Lemm the Relic Seeker.
This man extremely jealous of his collection is willing to buy our rare (and useless to us) items. We can sell them the Traveler's Journals (200 Geo), Hallownest Seals (450 Geo) and the King's Idols (800 Geo). At this point the choice of how much and what to sell is entirely up to you, based on your need and your ability to keep your money tight. In any case, we can come back here at any time.
The interesting thing about Lemm is that selling relics to him often tells us interesting anecdotes. For example, by selling him an Idol he will explain details about the figure of the King, an enigmatic character. Selling him a Seal instead will tell about gods Five Great Knights of the realm, whose names and appearance have been forgotten. We have actually already encountered the armor of one of these and in the future we will meet others, in life or in a dream ...
By continuing to sell him seals, Lemm will tell us about a statue near the entrance to the city and he will assume it was one of these knights. We will discover that this is not the case, but let's go in order. Once out of the store, we operate the lever and before using the elevator we recover the large block of Geo on the left. At this point we go down and examine the device near the hatch.
Here one is required simple key, which you should have with you, but don't use it for now - we'll come back here later. Continue to the right to reach the square with the statue we were talking about a little while ago.
Sacrifice and truth
After the cutscene you can finally talk to Hornet, even if for a short time. She has understood that she has underestimated us and will also say something interesting: “Your tenacity is born from two voids". She also speaks of the sacrifice that sustains the kingdom, which we must discover, and she will tell us to seek the Tomb of Ash once discovered the truth, if we are to help Hallownest survive. In that place we should receive a brand, according to him.
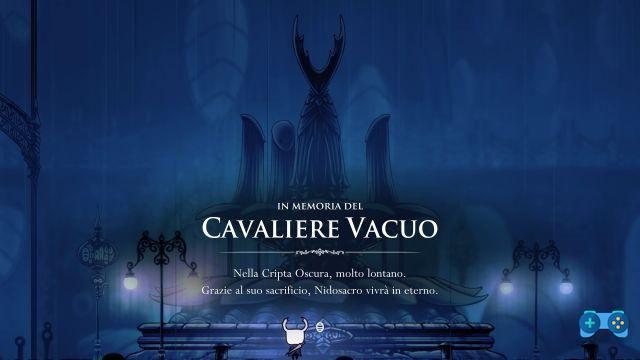
When Hornet is done, he will disappear as usual, leaving us alone in the square with this strange statue. Examining it, this is dedicated to Hollow Knight, Hollow Knight, whose sacrifice will allow Hallownest to live forever. This is exactly what Hornet was talking about, but what is the truth? At this point the Temple of the Black Egg it will be added on the map, to the Forgotten Paths. Also note that the Hollow Knight is surrounded by three figures who observe it. We will soon discover the role of these. The door ahead is obviously closed.
Let's go back, up to bench where we met Quirrel. Here ends our episode today. In the next we will go to examine the temple that has appeared on the map and we will continue with the exploration of the City of Tears, in Shrine of Souls.
Return to the Howling Crags guide
Back to the index