After the review, there is also the 4 News solution of the game belonging to the most Stylish videogame series ever!
The Solution: Missions 1 to 5
The guide was created by playing Devil May Cry 4 on XBOX 360, therefore the keys and control indications are referable to the Microsoft Joypad, even if the gaming experience and history do not register differences in the PS3 version.
The Solution is based on a Normal / Deadlock difficulty.
Mission 1: Elective Affinities [Black]
This first mission consists in facing Dante in a fight in which you will be able to learn the main controls of the game. The fights alternate with spectacular videos and once you have followed the main instructions you will find yourself facing Dante seriously using the teachings properly.
Mission 2: The door of L'Enfer
From the beginning you will have to face a good number of enemies and then subsequently head towards a door at the end of the square; Easily noticeable as a red sphere is in front of it. Once inside you will have to face an easily overcome fight. Then you will have to go to the next door that will lead the player to a terrace, in which it is possible to find a further entrance that leads to the cathedral.
In the cathedral there is a column illuminated in a blue color that will allow your character to obtain an additional power with which you must again go to the terrace via a blue platform not far from the column. Once you have used some platform, moving from the terrace to the terrace you will have to face some short fights that can be easily overcome.
Once in the district, shortly after descending the staircase, turn left and go up to the roof on which you will find an object in a well hidden corner. Once you have the object, you can jump off the roof and continue on your way. Arriving at the Port of Caerula, continue straight ahead until you arrive in front of a platform that leads to the customs warehouse inside which you will find yourself facing a fight; done this head to the "blue target" which will unlock the passage if hit enough. The passage leads to a car with which a bridge located in the port can be lowered.
You will then have to go back and turn left shortly after passing the last platform and reach the first mining area where a divine statue is located, reachable after taking a momentum from another platform.
Through the divine statue you will be able to acquire skills and objects: at this point we advise you to buy some as the next area is the hills of Ferrum where the boss at the end of the level is located. Once the boss is defeated, just continue to the next area and the level will end.
Mission 3: The White Wing
Always proceeding straight after the divine statue you will find yourself at a crossroads.
On the right, continue the level facing a group of demons. On the left instead you will find yourself in front of a weak wooden surface to be destroyed in order to obtain a large amount of red spheres. Returning to the point where the demons were defeated, you can continue the level by climbing the wall behind the waterfall. With the Devil Bringer you will then have to reach the next wall and then continue straight and face a further fight. Once finished, there will be another fork on the left of which there is an object.
After the crossroads you will arrive in a snowy area that leads to the Castle of Fortuna.
A little unexpected, however, will force the player to face a fearsome fight.
Once the challenge is over, you will have to proceed towards the castle door. Once inside, in the large hall, two entrances will be accessible which finally lead to the same corridor.
Crossing the olive door, the one closest to the divine statue, you will reach the left side of the corridor. A little further on the left you will find a red door that leads to the torture room where a slightly longer fight awaits you than the one faced as soon as you enter the corridor. After the fight, go up the stairs until you reach the series of platforms.
- The first platform and the second one do not present any difficulties. To overcome the third you will have to give yourself a momentum on the further platform in mid-air, therefore essential to seize the right moment.
- The fourth platform, composed of three points of momentum that tend to vanish after a short time of activity. It is therefore essential to take the momentum as soon as they regain shape so as not to fall.
- The fifth platform could give some problems because due to the poor view it seems to go back to the previous platform; Although in reality this is not the case.
- The sixth and last platform does not present particular difficulties; But watch out for the third momentum point that tends to go upwards and if you carry yourself too high you risk getting hurt due to the blades on the roof, this would force you to have to face the platforms and also the previous phase of the combat.
Once you have passed the platforms you will reach the area above the great hall and you will have to proceed towards the central courtyard that leads to the Foris waterfalls after a single fight.
The falls will take you back to the central courtyard again, but on the other side where you will have to face a new fight.
Entering the great hall again, the magic barriers of the room can be canceled; However, you will not have to go back down but proceed to a door near your current position that leads to the Gallery where you will have to face another fight to get to the library. The last fight will see you face off against a new species of enemies whose weak point is the back.
At the end of the fight, you must approach the yellow column to get a new power and thus end the level.
Mission 4: Cold Blooded
At the beginning of the level the player will immediately have the opportunity to understand how to use the Gyro Swords, necessary to return to the gallery where one of the many fights will await you.
Once you have passed the gallery and reached the great hall, you will have to destroy a sort of sarcophagus containing a seal that cannot be used at the moment using the Gyro Spada on the floor below.
We must then proceed towards the red door in order to reach the great hall with its corridors containing the Gyro Spade that must be put back in their place. Proceeding to the left in the corridor, you will be able after a few steps to notice an entrance that leads to the dining room where you need the power to repel fire using the Gyro Sword as a shield. With the Gyro Spada you can also destroy the source of the fireballs which will reveal a secret mission. Instead shortly before on the right there is an entrance for the next phase of the mission. You will arrive in the previously inaccessible room of the great hall. You can then take a Gyro Sword to the other side of the corridor.
It is useless, however, to immediately put it in its place because at the end, on the left side of the corridor, a Gyro Sword is needed to free another imprisoned one. After freeing the second Gyro Sword you can bring them back to their place. The enemies that arise on the way are easily ignored as they can be easily eliminated with the Gyro Spade in motion.
Once placed in their place, a seal will unlock that allows you to proceed beyond a red door where you will have to face Bael, the boss at the end of the level.
Once defeated you have to go to the door on your left to finish the level.
Mission 5: Trisagion
Right from the start it will be necessary to face two fearsome demons. The best way to defeat them is to constantly hit them with the Devil Bringer until their protection fails. We must then proceed towards the staircase (under it there is a secret mission) and then go up and enter the master's room where a further fight awaits us (A mirror hanging above the fireplace in the room hides an additional secret mission)
You will find yourself in the upper part of the torture chamber where you will have to destroy a column using the Gyro Sword, and then find yourself at the bottom of a well where, after passing a new enemy, we will find scattered treasures and above all the Winged Talisman, necessary to continue the mission and come up from the well.
Once the area has been cleaned up, you can proceed with the ascent through the seals revived by the Winged Talisman, thus reaching the torture chamber.
Once inside, you will have to face a slightly more extensive fight than usual to proceed towards the corridor and after a more challenging fight you can proceed towards the Great Hall where the previously useless seal will be revived by the Winged Talisman.
Using this seal you can reach the huge chandelier on which there is a crack to be examined using the [A] key.
Then you have to go straight ahead to reach a basement that leads to the underground laboratory where the mission ends.
The Solution: Missions 6 to 12
Mission 6: Resurrection
You will immediately find yourself in front of a ravine in which you have to throw yourself in order to access the research department where you will have to face a more complex fight than usual as you will have to face a new species of enemies. The best way to defeat them is to grab them with the Devil Bringer during their attack. At the end of the fight, you will be able to access the games room where you will have to hit a dice until you bring your "statuette" to the end of the games.
Apparently it seems like a game of luck but with a little cunning you can easily deceive fate. The die moves in the same direction and at the same rhythm so it will be enough to take the rhythm of the dice that every seventh time shows the same number (The die is then turned seven times before showing the previously noted number) and then finally hit the die with the Devil Bringer. With the sword the "trick" does not work. Once the games are over, you have to enter the room now accessible to face the boss.
Once you have defeated him (we remind you that in the following pages you will find some useful tips to more easily defeat all the bosses) you have to proceed towards the only door reachable nearby to get to the Foris waterfalls. Once the special mechanism in the area is activated, you can proceed towards the staircase leading to the room called "Creation of the Angel" in which you will have to reach the other side of the room and only after three fights will you be able to access the underground laboratory and then go up to the Gran Salone.
However, you should not go down to the ground floor but stay on the first floor and head towards the central courtyard through one of the two doors at the bottom, in front of the painting of His Holiness.
After the central courtyard you will reach the waterfalls, go down all the stairs past the point that decrees the end of the mission.
Mission 7: Echidna
Proceeding always straight ahead, you will soon reach the valley of the winds and immediately after having faced a simple fight you can proceed towards the staircase that will lead to the ruined church. Straight in front of the entrance there is a further staircase that leads to a mechanism to be activated in order to continue and reach the valley of the ruin where there are some platforms to be overcome to proceed towards a further mechanism; this time, however, you will have to face a fight in constant motion to avoid falling from your position.
Having overcome the inconvenience and reaching the Lapis river, you will need to continue towards the ancient square where a fight will await you. Once finished it will be necessary to proceed to the next area that leads back to the valley of the winds, but from another angle where a Gyro Spada will be accessible with which to make your way by destroying two walls in order to reach the valley of the ruin in which you will have to go on a mad dash to avoid Echidna's fury.
Once the danger is over, you can proceed towards the forgotten ruins that subsequently lead to the Deep Forest where you will have to face Echidna, the end-level boss.
Once defeated, you can proceed towards the cluster of plants and dissolve them with the new acquired power, thus ending the mission.
Mission 8: Profession of Faith
Proceed until you reach the Lapis River, accessible again thanks to the new power. To do this you will have to go to the top to reach the ancient square where a fierce fight with a new type of demons awaits you. Once defeated, you can proceed to the Valley of the Winds and head back to the staircase leading to the ruined church; in which the passage to the next zone will be illustrated.
It presents a puzzle that could turn out to be a puzzle ... but looking at the following picture:
It will be easy to understand the solution to the problem that lies in the shadow produced by the two columns. Only one of the four ways is therefore the right one since the other three simply come to a fight that will force the player to repeat the entire section of the game.
In this phase you must first proceed straight, then to the right and finally to the left.
Having overcome the enigma, the player will find himself at the forgotten ruins which, always proceeding straight, lead to the training area and finally continuing straight ahead to the Grand Album bridge which consists of a long straight that leads to the boss at the end of the level: .
Defeated I think it will be enough to take a few steps to finish the mission.
Mission 9: For You
A complex combat will catch you at the beginning of this mission, the goal is to defeat three different prototypes of the same kind of enemy. The best way to get rid of the three is to eliminate first the blue one, then the red one and finally the golden one, which is certainly the most powerful of the three.
At the end of the fight and always proceeding straight ahead, you will reach a bridge which, however, will not be accessible. However, an entrance will be unlocked on the right side of your position in the grand hall. The only obstacle are lasers that are not too difficult to overcome.
A trick to overcome the lasers would be to use the double jump and guns wisely so as not to immediately fall and risk being hit by them. You will arrive at the key chamber where a fight equal to the previous one will be waiting for you.
Using the key acquired in front of the column in the room, it will be possible to manipulate space-time through a mechanism in order to proceed to the next room.
In the warehouse of the experiments, an elevator can be activated which, after a short fight, will lead to a room in which space-time manipulation will be essential to continue. This path will be carried out for two more times in a row in an identical way to each other and then reach the room of Agnus in which you will have to face the boss, Agnus again, but this time in a demonic guise. Once defeated, the mission ends.
Mission 10: Glorified
The bridge is finally accessible; So you will have to go back. Arrived at the warehouse of the experiments passing Agnus' room you will have to proceed towards the elevator where a fight will await you. A new enemy will appear and even if similar to his two followers, it will be much more dangerous especially in ranged attacks so eliminating him immediately will be the wisest move.
Then you will have to proceed to the next lift to activate the machinery that will allow you to jump directly away from the area without taking any further lifts. It will not be easy to reach the machinery as the view can be somewhat deceptive when you have to pass the lasers set up on the passage.
Once they are back on the ground floor, no mechanism will need to be activated but you will have to proceed towards the key room where a fight will await.
The next area takes place in the great hall and from there you will have to proceed towards the bridge paying attention to the lasers. The first room after the bridge is richer in lasers than any other room seen so far and you will have to choose the time of the jump well if you want to proceed to the next phase without dying.
After the delicate phase of the lasers, you will have to jump down into another room where the power of space-time control will be essential to proceed to the next room. At the end of the corridor lies a magical passage that can be reached after a fight. The passage leads to another room which, after a last fight, leads to the end of Mission boss; Dante.
Mission 11: The Ninth Round
Finding yourself in the advent tower you will need to proceed to the opposite side of the area to activate a series of platforms that lead to the next floor, in which you will have to face a fight.
Once finished, you will need to activate the red pedestal to access the next floor. The player will find a magical entry on the left but will have to proceed to the right where a gate is located.
Nero will basically have to lean on the gate and then use the Devil Bringer to grab a demon continuously until the gate opens via a weight mechanism. Proceeding always straight, you will arrive at an area full of platforms to overcome. In this area the ability of the double jump is very convenient; However, if the jump is bad, the worst consequence will be the possibility of having to face a fight again. Once you have passed the platforms, you will have to face a quick fight. Subsequently it will then be necessary to activate other platforms in order to move towards the next fight which will then allow you to activate the magic passage below always through a pedestal. Once you have passed the magical passage you will have to face Sanctus: His Holiness.
Mission 12: A New Beginning [Dante]
Once the first fight of the mission is over, it will be necessary to proceed to the next area in which a new species of enemy will appear. The only thing from after the fight will be to retrieve the winged talisman in the next area, which automatically leads to another area. You will have ten minutes thereafter to escape from the base before it collapses. You must therefore always proceed straight, ending up in the area below where you will have to take the lift by activating the appropriate mechanism.
The elevator will take you to the area where the Kronos key was entered which will now need to be removed in order to reach the security corridor. Once you have passed the lasers inside the room, you can proceed to the great hall where a new fight will await you. Once finished, the player can finally take away from the area and then cross the Album bridge and thus end the mission.
The Solution: Missions 13 to 20
Mission 13: The Return of the Devil
Proceeding straight past the divine statue and keep an eye on the railing on the right where you can see a point from which it is possible to jump down. After the jump you will not have to proceed under the bridge but go to the opposite side to find yourself again in a point where you will need to jump again next to a railing where a fight will await you.
Once the enemies have been defeated, a cloud will be visible a little further on, in which you will have to enter to reach the Valley of the Winds. From there we will have to proceed towards the Church in Ruin (the most circular point of the map) but through a cloud we will end up in the ancient square where we will find another fight waiting for us before we can proceed subsequently towards the Lapis River. A bridge will be visible in front of us that allows access to two ways. However, both will prove wrong since the right access is under the bridge, a cloud that leads directly to the Ruined Church in which there is an entrance to the Mysterious Forest. Here, as in the previous mission with Nero, you will have to proceed following the clearly visible shadow in the following image:
The first time you go straight, the second back, the third and fourth to the right.
After passing the area you will arrive again at the Forgotten Ruins and then proceed straight ahead and then face Echidna again. Once defeated, just proceed to the next area to finish the level.
Mission 14: The Forest of Ruins
Once the mission has started, you will need to proceed straight to the next area: The Lapis River, accessible after a single fight.
At any time, however, the protagonist will be chased by a Fault, a very particular demon that forces the protagonist to face a fight in the underground.
The Trickster style is therefore very good to adopt in order to be able to move quickly.
At the end of the fight in the Lapis River you will have to proceed towards the Piazza Antica and once you have overcome a fight here too you will have to proceed towards the Valley of the Winds.
Proceeding straight ahead, after passing the Gyro Spada, the protagonist will then have to take to his left and climb the rocks in order to arrive at the entrance of the forest which then leads to the Foris waterfalls where the mission ends.
Mission 15: Fortuna Castle
The mission begins in the Foris waterfalls; climbing the staircase on your left you will arrive at the central courtyard where you will have to face a very difficult fight against the Blitz, the most powerful minor demon ever.
Once the Blitz has been eliminated, you will have to proceed towards the Grand Hall, ignore the closest entrances that lead back to the central courtyard and enter the more distant one.
Thus you will find yourself in the Gallery; from here you will have to proceed to the Library where you will immediately engage in a fight. Proceed towards a secret entrance that leads to the great room, from there only the dining room will be accessible which, once faced with a further fight, leads back to the great room which will offer the Torture Chamber as the only solution; From here, head to the spiral shaft. In the well, however, it will be possible to activate a further seal that leads directly to the upper part of the chamber and from there it will be possible to access the master's chamber in which you will again have to face a Blitz and other minor demons.
Once the fight is over, you must proceed to the soldiers' cemetery and from there proceed to the next area where you will face the boss at the end of the level: Dagon.
Mission 16: Hell
A poisonous gas will make the whole area hostile. So in order not to lose too much life you will have to proceed quickly to the research department and quickly end the fight. You will then need to proceed to the games room. Go past the Katana room. After a further fight you will be able to access the Foris waterfalls where you will have to climb a staircase to enter a room where yet another fight will await you. After two more fights it will be possible to rise to the surface. From there you can proceed towards the Great Hall and then leave the Fortuna Castle.
After two fights traversing the entire area, it will finally come to the fight with Berial.
Mission 17: Adagio for Archi
Finding yourself in the first mining area you will have to continue to move back towards the port of Caerula where a single fight will await you which will then unlock access to the residential district. A further fight will have to be faced to reach the commercial district there will be a much longer-lived battle than the previous one. You will then arrive in the theater square where you will have to overcome the enemies and head to the next area where once again Agnus will be waiting for you.
Mission 18: The Destroyer
The whole level will consist in facing The Savior, once defeated, the level will be over and all that remains is to enjoy the proposed cutscenes.
Mission 19: The Successor
Proceeding always straight ahead you will arrive in a games room like the one previously crossed, but this time much longer. Using the same trick described above, the difficulty will be minimal: apparently it looks like a game of luck but with a bit of cunning you can easily choose your fate during the games. The die moves in the same direction and at the same rhythm, so it will be enough to take the cadence of the dice that every seventh time shows the same number (The die is then turned seven times before showing the previously noted number) and then finally hit the die with the Devil Bringer. With the sword the "trick" does not work.
In the first phase a "four" is enough to pass the first stage but you will have to face a series of Aneli before you can access the next phase. In the second stage a "Six" will be enough to face the next fight against Berial. In the third stage you will have to play with the dice in two times, first aiming for a "three" or a "five", and then aim for a second number based on the one previously chosen, the enemy to be faced in this case will be Bael . In the fourth stage it is advisable to aim for a "six" and then a "three" to challenge the penultimate duelist: Echidna. In the last stage you will have to play in three halves with the dice: first aiming for a "three" and then for a "five" and then concluding with a further "three" and then going against the Angel Agnus, the last duelist . Once the latter is defeated, it will be possible to proceed towards an entrance to be knocked down with a sword and in this way end the mission.
Mission 20: The New Life
The whole mission is simply to face and defeat two bosses: first the Diabolic Sanctus and finally its Savior. Once both have been defeated, the game ends.
The Bosses
Dante; Mission 1:
The best way to beat him is to dodge his deadly blows with a side somersault (very useful skill, to be used after inflicting your own combo against the opponent in order to avoid unpleasant counterattacks).
Berial; Mission 2:
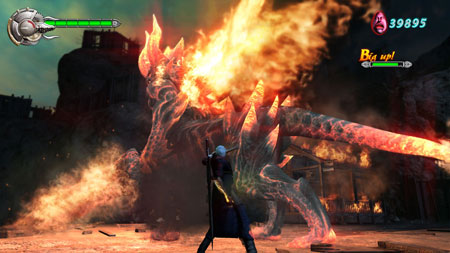
The best way to defeat Berial is to get close to it and hit it as often as possible, therefore it is preferable to adopt a very close combat tactic, getting close to the demon thanks to the Devil Bringer (Black's Arm) through which it can be used. the enemy as if it were a platform being too big to grasp.
It will be possible to inflict serious damage with the Buster [B without RB pressed] but only when it is weakened. The best offensive position to adopt is behind the enemy in order to take the least damage possible. The scenario in which the fight takes place will be quickly destroyed by the hand of the Boss and you will find many green orbs scattered around, very useful for recovering energy. When Berial launches an attack, it's best to back off as far as possible.
Bael; Mission 4:
Bael will initially present himself as two female figures who are not particularly difficult to hit. Suddenly, however, the boss will present himself in his true form: A huge toad.
His ice-based ranged attacks are particularly fearsome so best deal with him in extremely close combat. Some attacks can be easily dodged with a side somersault, which is also very useful for dodging the running attack he makes when alternating with the two female figures.
Agnus; Mission 6:
Seemingly difficult enough, the Boss Agnus will keep itself sheltered behind solid glass. The best way to defeat him is to throw the numerous enemies, consisting of flying swords with somewhat offensive powers, against the glass, grabbing them in flight with the Devil Bringer and then grabbing them using the Buster by pressing [B] without holding [RB].
Agnus' most dangerous attack is to charge the room with a strong electric current that can only be dodged if suspended in the air for the duration of the entire attack. If you don't have the double jump, you need to jump with perfect timing. In both cases the guns will be used in an asphyxiating way to stay in the air as much as possible.
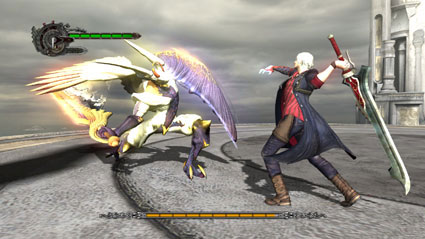
Echidna; Mission 7:
Echidna will present itself as a huge snake very fast and the best way to avoid collisions with it is to perform a side somersault often. After a few attacks Echidna will show her true form without protecting herself allowing Nero to mercilessly attack her with the sword. The best way to defeat her is to quickly reach her via the Devil Bringer by grabbing her. It is highly recommended that you have the maximum “Snatch” level in the upgrade menu.
Angelo Credo; Mission 8:
Creed's shield is incredibly tough, and the wisest move would be to land your attacks on his back. In some cases, however, it will be possible to hit him from the front and if this opportunity arises, for example if tired, then the best solution would be to use the Buster frontally in order to inflict a very high damage.
When at a considerable distance from Credo, it will use an easily dodged ranged attack with a side flip.
Angelo Agnus; Mission 9:
Agnus does not have a real weakness, the wisest move is to hit him every time if the opportunity arises, especially when he is unleashing an attack in order to cancel the magical sequence. A great way to hit it is to unleash the fury of the Yamato, but the Buster, if used properly, will prove just as devastating. Agnus' most fearsome move drains the player's energy to recharge his own. So the best advice for this boss is a correct use not only of the Buster and the Yamato, but also of the Snatch of the Devil Bringer to always stay on Agnus's ribs and hit him constantly.
Dante; Mission 10:
As a skilled warrior, Dante will certainly give the player a hard time. It will be important to dodge its attacks with the right timing and not throw a dead weight against it or else he will skewer Nero with his sword mercilessly. To keep him at a distance you can shoot him with the Blue Rose thus taking time. The Devil Bringer will prove useful to grab it and throw it towards you to perform a combo. It is not worth trying to use the Buster as the chances of failing to use this move are high and you will usually suffer a counterattack.
It will also be fundamental to distance yourself a bit, at least every now and then, and therefore not always remain on him as usual with most bosses.
Sanctus / His Holiness; Mission 11:
Compared to previous Bosses, His Holiness will prove to be much easier to defeat. To protect himself, Sanctus evokes a shield that must be destroyed with a sword and since it moves from one area to another it might seem difficult at first glance, but since it evokes two platforms with very limited offensive powers, you can use them as springboards. launch to reach it with the Devil Bringer and brutally hit it with the sword until its protection falls apart until it is harmless, an event that will allow the player a good "dose of seconds" to inflict massive damage on the enemy.
Obviously it will not remain motionless forever and will therefore begin to regenerate its shield and at that moment the best thing to do will be to move so as not to suffer any damage.
The player will also have to deal with some fireballs or similar during the fight, but Nero will have an easy time dodging them simply by rolling to the side or using the enemy platforms. When His Holiness is dying, however, he will use the "Savior" in some cases to try to inflict as much damage as possible. but Nero will have an easy time even dodging the attacks of the "Savior".
Echidna; Mission 13:

With Nero, Echidna was much easier to beat, as getting close with the Devil Bringer is much easier than getting close to the enemy relying on Dante's simple legs. Furthermore, the blows must be inflicted very high and the only way not to make this fight impossible is to have as many skills as possible with the "Swordmaster" art, also the double jump ability would be handy. The difference between the "Swordmaster" used with the [B] key instead of the common [Y] key is that only [B] keeps the character suspended in the air during the entire combo, as opposed to [Y]. Killing Echidna would therefore be quite complicated if you simply use the [Y] key since Dante cannot count on Nero's Devil Bringer. Scattered around the combat area you can find some very useful eggs to recover energy.
Dagon; Mission 15:
One of Bael's many brothers. Dagon will prove to be precise and identical to the latter also in skills. Dagon will initially appear as two female figures who are not particularly difficult to hit. Suddenly, however, the boss will present himself in his true form: A huge toad.
His ice-based ranged attacks are particularly fearsome so best deal with him in extremely close combat. Some attacks can be easily dodged with the Trickster style, a skill that is very useful for dodging even his running attack made when alternating with the two female figures.
To attack it it is preferable to use the Swordmaster style.
Berial; Mission 16
Being without the Buster you will have to limit yourself to attacking Berial from behind brutally with the Swordmaster style alternating with the Trickster to dodge any attacks. If you have the double jump you can also try to attack it from the front as the Swordmaster style allows you to remain suspended in the air during a combo.
Mission 17: Angelo Agnus
With Dante it will be essential to attack him as frequently as possible in order to avoid Agnus's attacks, which in some cases regenerate him.
The best way to act will therefore be to attack him with the Swordmaster style and mainly use the sword, but when he moves away quickly or perhaps uses any attacks that do not allow the player to get close, it will be better to take advantage of the "Lucifer" weapon which will prove to be quite effective. .
Mission 18: The Savior

The Savior's ranged attacks combined with enemies in circulation won't make your life easy, attacks to dodge at least with the Trickster. All blue crystals on the Savior's body will be destroyed. Proceeding in front of the character you can reach a platform that leads to a small square where you can proceed to the right or left, both directions lead to a small square where you will be subject to the attacks of the Savior. When he attacks with his left arm, however, it will be possible to climb on it, thus being able to destroy a crystal on the forearm and another on the shoulder. But then Dante will be thrown some distance away from the Savior. Again it will be a good choice to get on the enemy arm so that you can destroy the crystal on his forehead with the Shotgun.
Ranged weapons will therefore prove to be very effective in this clash and when the enemy has accused a few too many blows he will fall to the ground allowing the protagonist to move from platform to platform destroying numerous crystals before the opponent gets back on his feet. On some positions, cannons can be found that make it fall once hit. It is not recommended to use the Pandora during the meeting.
When the Savior has suffered serious damage, he will begin to perform an attack so devastating that it will be necessary to change zones in order to avoid taking serious damage. Once all the minor crystals are destroyed, only the largest one on the Savior's chest will remain and he will have an energy bar like all the other end-of-level bosses.
When Dante is in the defensive phase, i.e. under attack, the use of the Lucifer weapon will be an excellent choice as an explosion could hit him as he approaches to attack Dante.
Otherwise, the shotgun or pistols will be an excellent choice: obviously loaded by holding down the X key. If you do not have this ability, the damage suffered by the Savior will be less.
When the Savior attacks with particularly powerful attacks the Trickster style and the Lucifer weapon are not enough to avoid damage, it will be better to change the area via a platform.
After a certain amount of damage suffered the Savior will fall and it will be time to move towards the enemy and attack him with the Sword and the Swordmaster style or simply with the Dark Slayer style using the katana.
Mission 20: Devilish Sanctus
Similar to the previous fight, but this time it not only has a protective shield and the usual ranged attacks: it also has a very powerful demonic weapon with which it unleashes lethal attacks to dodge while keeping away and using the side flips. He will use this attack after taking heavy damage and when his shield is weakened, immediately after the combo he will try to regenerate his shield. It will therefore be essential to dodge his attacks with the right timing and then use the Devil Bringer to quickly approach Sanctus using the platforms near the enemy, but be careful that they are explosive. When the enemy falls to the ground without his shield, he will be attacked with a sword and then with the Buster, strictly with the power of the Yamato active.
Mission 20: The False Savior
The mission will not end with the defeat of Sanctus in Diabolic guise as he will again present himself with his Savior. The absolute protagonist in this battle will be the Devil Bringer with the Buster. (B without RB pressed). When the Savior tries to strike with his right fist, it will simply be dodged and then hit his hand with the Buster. In this case he will then try to hit with his left fist which will in turn be hit on the fly with the right timing. All this will be enough to defeat him and enjoy the end of the game.
The lesser Demons
Scarecrow Arm / Leg:
Demons not particularly dangerous, easily eliminated with sword strokes or in the case of Nero with the Buster.
Mega Scarecrow:
A huge demon with great power, only Dante will meet him during the story. The best way to defeat him is to hit him repeatedly with the sword with the Swordmaster style. Be careful not to remain immobile once the enemy is eliminated as his blade could still cause damage.
Frost:
With Nero the best way to eliminate it is to use the Buster properly. With Dante you should preferably use the Swordmaster style. You will also need to pay attention to their ranged attacks not to mention their regenerative abilities.
Assault:
The best way to defeat them is to attack them by surprise; So while they don't use their own shield.
Lightning:
A very powerful and invulnerable demon when surrounded by electricity. With Dante the best way to defeat him is to use the Trickster style in conjunction with the shotgun until the electric shield leaves the Blitz temporarily. At that moment it will be hit without mercy, if the Blitz manages to hit with its own blows it will cause serious damage especially if it is on the verge of death (recognizable by the fact that its aura from electric yellow turns red). With Nero you can defeat him by avoiding him with side somersaults and then, as with Dante, shoot at will.Obviously the firearms will not have much effect if they have not been properly upgraded, so it will be necessary to acquire the skills with the respective Ebony & Ivory or the Blue Rose in the case of Nero. If the player will face more enemies including the Blitz, it will be better to focus on it first as it will not only have the player as a target but will also be hostile to any other demon.
Gladius:
The best way to "use" this sword-shaped demon is to hurl it at the enemies using the Buster [B without RB pressed]. when attacking them with a sword on the ground.
Cutlass:
With Nero the best course of action will be to dodge surprise attacks with a side somersault and then jump and grab the enemy with the Devil Bringer.
With Dante instead you will have to wait for the right passage by combining the Trickster style with firearms.
Basilisc:
The Basilisc is a demonic dog that suffers a lot against firearms but also easily eliminated in a close confrontation thus avoiding any enemy ranged attacks.
Chimera Seed:
Apparently very weak, if it manages to merge with another type of demon it becomes much more powerful.
Chimera:
Result through the union of a Scarecrow and a Chimera Seed. They are much more powerful than the previous two demons and very strong in close combat since they can inflict damage by waving their weapons even while they are subject to enemy attacks. The best way to deal with them is to use their firearms which the "Chimera" are particularly affected by.
Mephisto / Faust
Both very powerful and resistant until they take too many hits thus returning to their original form during which they are helpless and very vulnerable. The best way to bring them to their original state is certainly to use their firearms properly, to which, as mentioned, they are particularly vulnerable. So with Dante the shotgun will prove to be a great choice. With Nero, on the other hand, it is preferable to try to grab them continuously with the Devil Bringer until the enemy protection wears off.
White / High Angel
Their weak point is the back not protected by their possible shield. With Nero it is worth using the Buster in order to cause massive damage to the enemy. With Dante, however, the Swordmaster style will prove to be extremely effective. As a ranged weapon Dante could also use the Pandora with which to launch missiles at the enemy.
Fault
Only Dante will have to deal with this demon.
It is preferable to avoid it constantly with the Trickster style so as not to end up in unwanted areas full of demons, if you want to stay in peace for a few minutes, however, you could try to hit it quickly with the sword.
Secret Missions
Here are some videos taken from YouTube where the secret missions are illustrated, where to find them and how to complete them:
Extras
Finishing the game in Deadlock Mode unlocks the "Palace of Blood“: A kind of classic arcade mode in fighting games. Also the "Son of Sparda”More difficult than Acchiappademoni.
Finishing the game in Son of Sparda mode unlocks "Dante Must Die"And"Heaven or Hell". The peculiarity of Heaven or Hell lies in the fact that you kill the enemy on the first shot, but you also die on the first shot.
After the game, Dante Must Die unlocks "Hell or Hell”Where you face enemies on medium / hard difficulty, but unlike the player, they will not die in one shot. The "Costumes" are also unlocked that allow you to keep the transformation into a demon indefinitely.