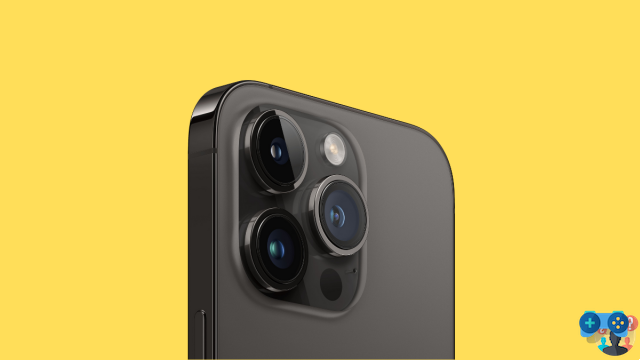
The iPhone 14 Pro brought with it the biggest iPhone camera upgrade in a long time with the inclusion of its massive 48MP sensor. So, if you've recently upgraded to Apple's newest flagship, here are some advanced tips and tricks to help you get the most out of the new iPhone 14 Pro camera.
Halo Master Chief Mjolnir Mark VI Gen 3 Exclusive Figure Is 35% Off Today Only
The 7600GB AMD Radeon RX 8 graphics card is expected to cost €349 in France
Efficient and energy-saving cleaning: vacuum and mop in one go with the latest DEEBOT N10 from ECOVACS
Xbox Game Pass users lose access to three highly rated games
NVIDIA is offering a custom Diablo IV GeForce RTX 4080 GPU for free
In addition to the camera, iPhone 14 Pro comes bundled with exclusive features such as an always-on display and the new dynamic island. The always-on display lets you see the lock screen at a glance without interacting with your iPhone.
This lets you check the time, track incoming notifications, and view lock screen widgets without ever having to unlock your iPhone. Dynamic Island, on the other hand, is a new way to track background activities and interact with them without opening Control Center or Notification Center. All of these features make the iPhone 14 Pro an excellent device, and things only get better when you factor in the new 48MP camera.
You can shoot ProRAW, ProRes, long exposures and more with the new camera on iPhone 14 Pro. But how do you make the most of these features to get the perfect image? Let's find out!
Here 24 great tips and tricks to help you take perfect shots when using the camera on your new iPhone 14 Pro. Let's get started.
1. Using the wide angle lens can work magic
Smartphone cameras have long been the primary camera for many users. While they're a great addition to your arsenal, smartphone cameras have restrictive focal lengths when it comes to their lenses that end up producing similar images regardless of your smartphone.
You can now overcome this restriction by using the wide angle lens on your iPhone 14 Pro. The wide angle lens allows for a different perspective where you can fit more subjects and elements into your frame and take advantage of the 13mm focal length for a look unlike most of your images.
The iPhone 14 pro features a 13mm wide-angle lens with an aperture of f/2.2. Also, this lens allows for a 120° field of view which can help you capture much more than the standard 24mm lens. If you want to make your images unique and put more and more information into your frame, we strongly recommend using the wide angle lens on your iPhone 14 Pro.
2. Use Portrait mode to add depth whenever possible
Depth is what distinguishes images from most photographs. They help your subject stand out by differentiating the background. Depth also allows the viewer to better understand the scene, allowing size and perspective to play their part intuitively. We therefore recommend that you use portrait mode whenever you are unsure of your current frame. Portrait mode can help enhance your subject and add depth to shots where conveying depth and dimension is a challenge.
This can include shots of the sky, where it becomes difficult to convey distance if you only have a few subjects in the foreground, such as a tree or some birds. Portrait mode can also help improve nature photos where the background may be too chaotic to pay proper attention to the foreground subject.
So if you find yourself confused between photo modes due to a chaotic background, be sure to try portrait mode for a quick and easy fix. If you want to get rid of the background completely, we recommend trying the following lighting modes in portrait mode.
- Mono stage light
- High key mono light
- Stage light
These modes will completely eliminate the background if the subject is easily distinguishable in the foreground. Therefore, these modes can help you capture images with chaotic backgrounds by completely removing the background altogether.
3. Apply photo styles to avoid excessive editing
Photo styles are automatically applied to your captures depending on your choice in the Settings app. These styles can help you easily adjust and change the look of your captures. Photo Styles apply changes to the tone and warmth of your photos in real time. Adjusting these values can help you get the right look for your image in real time without having to rely on image editing in the post-production process.
However, this can ruin your images if you don't adjust your photography styles beforehand to match the current lighting conditions. This is especially true when capturing images in challenging lighting conditions where cold and warm photographic styles can make or break the final look of your images.
Therefore, when capturing images using your iPhone 14 Pro, you'll want to adjust and fine-tune your photography styles to get the perfect color and white balance in your images.
4. Use the timer when taking long exposure shots
So when you're taking long exposure shots with your iPhone, it can be difficult to keep it still, especially when you press the shutter button. Thus, the timer option in the Camera app can be of great help in such scenarios. The iPhone's Camera app lets you set the timer to three or ten seconds. This will allow you to press the shutter button early, introducing a delay in the capture, which should give you enough time to keep your iPhone still for a long exposure shot. So, if you like astrophotography or low-light imaging, using the timer can help you improve the quality of your images dramatically.
5. Capture HDR whenever possible
HDR, or High Dynamic Range, has long been a feature for iPhone Pro models that allows you to capture images and videos in 10-bit color depth in Dolby Vision. This leads to more dynamic range in your images allowing for better contrast and easily distinguishable highlights and shadows in your images. Highlights and shadows make or break 90% of images captured through the camera.
One thing you should remember is that iPhones create HDR images by composing three images captured at different exposures together. This can cause problems when capturing images where the subject is moving and introduce motion blur. Therefore, if you are capturing moving subjects, you may want to avoid HDR depending on your preference.
6. Use your light meter to avoid overexposure
You'll want to keep an eye on the light meter to make sure your images are properly exposed. The exposure meter will only be available after manually adjusting the exposure. The light meter will be hidden on your iPhone if you're taking pictures using auto exposure in the camera app.
7. Change the aspect ratio in advance according to your needs
8. Symmetry and patterns are the key to good images
This is a general rule of thumb when it comes to photography, no matter which camera you use. The symmetry between your background objects can help enhance your images and introduce order into chaotic backgrounds that would normally be hard to spot during image capture. Patterns can also provide this effect by allowing viewers to spot new patterns against an otherwise chaotic backdrop. You can introduce symmetry and pattern into your images by changing perspective, looking at different angles, and using different lenses.
Source: Unsplash.com Source: Unsplash.com Source: Unsplash.com Source: Unsplash.com
Symmetry and patterns can be seen easily in things like lights, lampposts, paths, poles, houses, and so much more. Keeping an eye on these elements in the shot and then aligning them can help you add pattern and symmetry to otherwise mundane shots. So, if you ever feel like your frame is missing something, be sure to look for patterns and symmetry in real-world elements to add some extra flair to your captured images.
9. Guidelines and Rule of Thirds
Guidelines are another important part of any photography. They help direct the viewer's eye to the desired point of focus in the shot you're trying to capture. The rule of thirds also builds on the same thing, allowing you to place your subject at general points that intuitively draw the viewer's eye to each frame. Keeping these factors in mind will help you intelligently position your subject in the current frame to improve the overall image while ensuring that the viewer's eyes are automatically drawn to your subject.
When it comes to the rule of thirds, you can toggle the toggle for Grid in the Camera app settings to help frame your images with the same in mind. Once the grid is activated, place the subject on one of the intersection points to follow the rule of thirds. Another thing to keep in mind while following the rule of thirds is to pay attention to the negative space in the current frame. Excessive negative space can sometimes overwhelm the rule of thirds making your subject look a little weird, regardless of the current background. In these cases, you may want to frame your subject intuitively and pay more attention to the guidelines in the current frame.
Leader lines can consist of many things in the current frame. Lampposts, streets, sidewalks, buildings, wires, and more can all lead to your subject if you frame it correctly. They can help point your subject subconsciously by ensuring that no matter what catches your viewer's attention, they will always end up at your chosen point of focus in the current frame. Here are some good examples of guidelines and the rule of thirds that will help you better understand these concepts and make the most of your iPhone 48 Pro's 14MP camera.
Source: Unsplash.com Source: Unsplash.com Source: Unsplash.com
10. Don't forget Macros
You can capture images, live photos, slow motion and time-lapse video in macro mode, which opens up tons of creative possibilities when capturing small objects and subjects from your iPhone. Macro mode turns on automatically when you're close to subjects and is indicated by this icon in the lower left corner of the Camera app when it's turned on.
Source: Unsplash.com Source: Unsplash.com Source: Unsplash.com
Your iPhone will automatically switch to the 0,5x lens when it's in macro mode, and you can manually turn it off by tapping the icon. You can choose to preserve your macro mode settings using Preserve Settings in the Settings app if you plan to capture a lot of macros…


![[Solved] Android App Won't Open Problem](/images/posts/a150cb8db0eb50df4b79257485e3c04c-0.jpg)