Today have one fast and reliable Wi-Fi network it has become a necessity in your home, office or even your business.
However, often the signal from the main modem/router it can be weak or not very extensive, especially if there are obstacles between the various spaces.
Furthermore, an unstable wireless network can also create difficulties for you to connect to the Internet, which are expressed in poor speed and stability.
From this point of view, a good solution is undoubtedly that of buy a wifi repeater. There are some for all budgets and needs. 🙂
If though you don't want to buy one and you have an old router at home that you no longer use, you can always use the router as a Wi-Fi repeater.
Depending on the case, to succeed in the operation you will have to perform several steps. But it's nothing too complex.
Follow me in the article, I'll show you everything you need to know! 😉
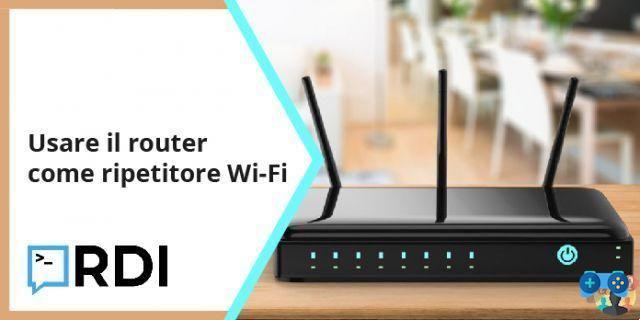
- Use the router as a Wi-Fi repeater
- Some preliminary operations
- Find the IP address of the main router
- Disable DHCP
- Set the last parameters
- Start using your "new" Wi-Fi repeater
- Some simpler configurations
- Conclusions
Use the router as a Wi-Fi repeater
Other than that, the main difference is that a router usually has better hardware and can, in general, do more tasks.
Indeed, a Wi-Fi repeater it's only function is to wirelessly hook into an existing network and boost its signal in a place where it is poor. A great example is the TP-Link RE305.
Conversely, with a router you can:
- create a secondary network;
- create a guest network;
- manage a more complete set of features.
Also, you can precisely extend the signal of your wireless network, as we will see shortly. 😉
Some preliminary operations
Before setting up your router as a Wi-Fi repeater, there are a few things you need to do:
- write down your connection data, i.e. the network name, password and Mac Address of the main router;
- Reboot your old router using the small reset button on the back.
In the latter case, you will reset the device to factory settings and you can configure it from scratch. 🙂
As for the first operation, I recommend that you do it from the primary router's management interface. You will have to enter the router and write down the data you find on the main screen.
Done? Now you can proceed with the actual configuration!
Find the IP address of the main router
For the purposes of this guide, it might be enough for you to know that your router's IP address is the numeric code you need to enter its management interface.
However, if you want a more complete definition, take a look at the article on what is an IP address. 😉
Usually, for a router it is 192.168.0.1 or 192.168.1.1. Finding the IP address is a necessary operation for use the router as a Wi-Fi repeater. In fact, from there you will be able to understand which addresses it manages and, therefore, which ones to assign to the old router.
If for example the main one is 192.168.0.1, then the range of managed addresses will give 192.168.0.2 a 192.168.0.254.
Manually set the IP address of the secondary router
For the secondary router, the IP address will have to be necessarily different from the main router, and this is where managed addresses come into play.
In fact, you can manually set an IP address which does not conflict with the primary one but is one of those connected to it.
To set it up, you just have to follow these steps:
- #1 Connect your old router to your PC via an Ethernet cable;
- #2 logs into the router by typing its current IP address into a browser's address bar;
- #3 click on WAN Settings;
- #4 set the type of IP address as “static”;
- #5 set an IP address of your choice between 192.168.0.2 and 192.168.0.254.
Once this is done, it's time to configure some more advanced parameters. But you can rest assured: follow the next steps of this guide! 😉
Disable DHCP
Acronym for Dynamic Host Configuration Protocol, DHCP is the feature that dynamically assigns a new IP address to each connection.
By deactivating it, you will avoid addressing conflicts and address management between the two routers. In practice, only the main router will assign an IP address to each device connected to the network. 🙂
The section of the Web Interface where disable DHCP it should be that of Wireless Settings or WAN Settings. It's not hard to find, but it varies depending on the router manufacturer.
Set the last parameters
At this point you can focus on last features to set to be able to use your old router as a Wi-Fi repeater.
Specifically, you will:
- enter the same SSID, or network name, as the main one;
- set the same type of protection;
- set the same login password.
These three parameters must be the same as the main network because your router will, to all intents and purposes, be a wireless access point to the network,
In some dual band routers you will also be able to decide in which band transmit the signal, and choose between 2,4 GHz and 5 GHz.
The first has one higher range but allows slower transfer speeds, while the opposite is generally true for the second.
In case you choose the 2,4 GHz one, remember to assign your old router the right channel to broadcast on:
- if the primary router transmits on channel 1, assign 6 or 11;
- if the primary router transmits on channel 2, assign 7 or 12;
- in the least likely case of transmitting on channel 3, assign 8 or 13.
In this way, the transmission bandwidth of the two networks will be optimized and one will not interfere with the other.
Start using your "new" Wi-Fi repeater
And with this you have finished the configuration. 😉
Now all you have to do is unplug the new Wi-Fi repeater from your computer and place it in the right place.
Based on the experiences I've had with range extenders, I recommend a place that is more or less in the middle - or a little further - between where you put the main router and where you want receive the expanded signal of the wireless network.
Some simpler configurations
Most modern routers also have the most up-to-date firmware. This means that make your router a Wi-Fi repeater it could be very simple.
You can check if you want entering the router, with the procedure that I have already shown you, and look for the "Access Point Mode" option.
You will find it, if present, in the section dedicated to the Wireless settings. Once found, check the box on Access Point Mode, in fact, or Repeater Mode and that's it. 😉
Alternatively, always try to:
- connect two routers in cascade;
- buy an access point, among the best available in online stores;
- try to turn a smartphone into a WiFI repeater. 😉
Conclusions
As you have seen, there are several ways you can extend your network with a router.
If you think about it, this can also be an opportunity for change your current router to a more powerful one. That way, you can still use what you already have and have a net that offers great coverage and great stability.
Inside the blog you can find many resources regarding routers, divided by type of connection such as:
- Best ADSL and VDSL routers
- Best fiber routers
- Best routers for EOLO


![[Solved] Android App Won't Open Problem](/images/posts/a150cb8db0eb50df4b79257485e3c04c-0.jpg)