Over the years, too many of the technologies that we might consider essential in our lives have moved on and in the case of computers we can find several problems in this regard.
The truth is that the days when operating systems only had to be installed via a CD or DVD are over , and that's why this time we want to stop on how to make them work via USB.
In fact, we know that there are some very specific situations where we have no choice but to configure the BIOS of our PC to boot an operating system from the computer , so read on to know how to do it.
What is a computer's BIOS?
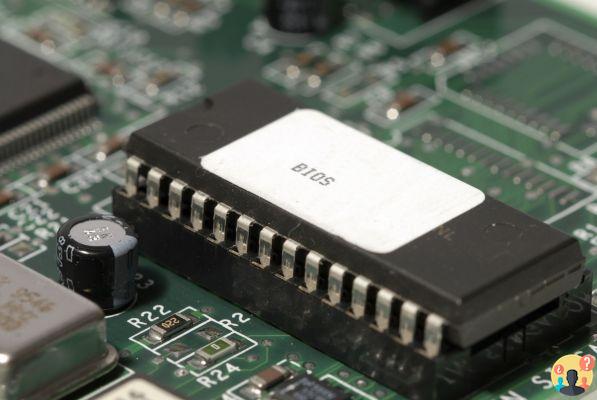
The first thing we need to analyze in these types of cases is what we talk about when we talk about a computer's BIOS, bearing in mind that when we refer to it, we are referring to the system or program that resides on a motherboard integrated circuit .
In this way we can talk about the firmware of a computer , taking into account that its operation occurs from the initial loading of the RAM, with the subsequent detection of connected devices.
When there are no errors, the original operating system of the equipment is booted, while Many times when you are having problems, it is best to have an operating system installed on an external device such as a USB .
Type in the BIOS
- ROM (Read Only Memory) : It is a type of BIOS that can only be registered if created together with the chip. In this way, the information or data cannot change over time, always remaining in its original state.
- EPFROM (Erasable Programmable Read Only Memory) or EEPROM (Electrically Erasable Programmable Read Only Memory) : we are talking about memories that stand out because they can be re-recorded on them, thanks to exposure to ultraviolet light.
- BIOS FLASH : this is one of the most used alternatives today, one that stands out in its segment, especially since we can re-record on it, without the need for a previous erasing device. You can even update them continuously, almost permanently.
Other than those mentioned above, we didn't want to keep that in mind there are other BIOSes to consider, such as the so-called Plug and Play PnP), BIOS or PnP adware BIOS .
These stand out more than anything because there allow you to recognize external devices, assigning resources to them necessary for their functioning.
Steps to set up your computer's BIOS and start from a USB
Well then we come to the reason why we thought of this article, related to the explanation of how to configure your PC's BIOS to be able to boot from a USB, especially if you include an operating system in it . For this you have to follow these steps:
- Connect the USB with the program to the computer and restart the computer
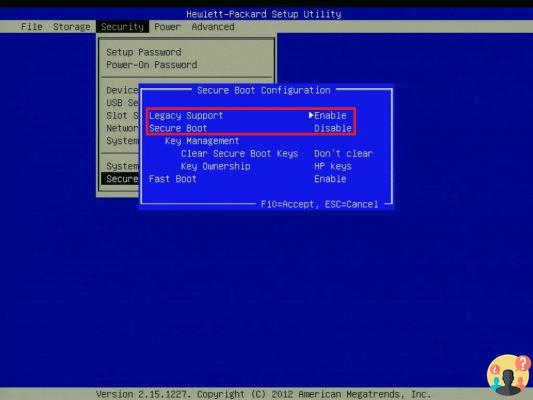
- Upon reboot, press the key that enters the BIOS, which in most cases is Esc
- Once there you will see the start option, being able to configure the start button from basic input
- Then you need to look for boot priority calling, which will prioritize an option when the device starts up
- To move and select the USB you have to use the keyboard and press with the Enter key
- When you find the pendrive, you have to select it as the first boot option
- Save all the changes made by pressing the F10 key and finish with Enter
From there, every time you restart your computer, you will be able to do it from the operating system that you have included in your USB, pendrive or any external storage device .
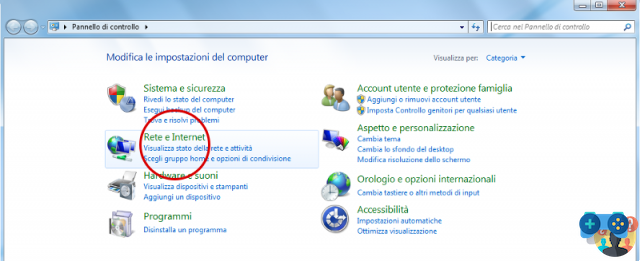
BIOS setup in Windows
It's not at all complicated what we should do in the BIOS, so don't be afraid if you haven't changed anything here. Naturally, you have to stand a lot be careful what you play and limit yourself only to what we will tell you below. In case you don't understand the subject too much because you might end up screwing up your computer.
Here you have to completely shut down the computer. After that you will need to start it and on the main screen you should see a legend telling you how to enter the BIOS menu. On some occasions some keys ” F " , others " Delete ", etc.
We can't tell you exactly which key you should press since it depends on the brand and a few other things. In some computers it starts with one key, in others with another, etc. If you don't see any indications, you will need to try the ” F " from F1 to F12 to check which of them you can enter the BIOS .
Once in the BIOS you have to go to the section " boot device ” to be able to view all the hard drives that you have connected and in this case the USB drive or CD. Once found, simply select it with the arrows and then enter.
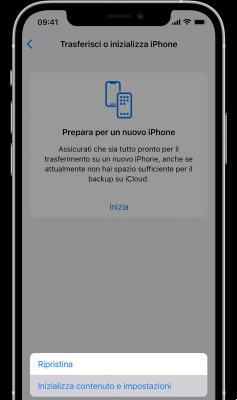
Avvio da USB o CD su MacOS
In the case of MacOS it is much easier as the system is prepared by default so that you can boot your computer from any external drive. Follow this little tutorial step by step and you'll see how simple it is.
- First you will need to hold down the ” key Option ".
- Once the presses you will see on the screen the option ” EFI Boot “. The first is " System ” and this refers to the hard drive, so we will focus on the second one which focuses on external drives.
And that's all, all you have to do for start the computer from an external drive .
How to boot from an external drive in Ubuntu
If we go to the Linux side, it gets a little more complex. But with this guide, you'll see that while it takes a few steps to follow, it's also not something too difficult to achieve.
- Of course, it is essential to have of the ISO of the latest version of the operating system . Which you can download without problems from Ubuntu.com.
- Now you will have to download UNetbootin . This is a tool to create bootable USB only to boot system from external drive. To download UNetbootin you will need to enter github.io .
- Once you have everything ready. You will have to open the application and then go to ” Image on disk ".
- After that simply select the ISO image by clicking on the three dots icon and then you will look for the ISO that you downloaded from Ubuntu.com.
- Now you have to go up " Distribution ".
- As for the drop down menu that you can see on the screen you need to make sure that the selected option is “ USB Drive ” which you will find at the bottom.
- Then you will have to select the Driver directory of your USB drive, after which simply press “ Accept ".
- Now begins the process which may take some time. You'll have to be patient and when you're done you'll have an Ubuntu in a bootable USB to be able to boot the OS from that drive.
- Next, you'll need to add persistence to the USB drive.
- You need to create a file” Casper-rw ” so that your version of Ubuntu saves the files in question.
- To achieve this you need to install the tool ” PDL Casper-RW Creator ” as it is the simplest and easiest way to get the results we are looking for.
- The use of Casper-RW Creator PDL it's very simple. You just need to select the drive that the USB is plugged into. So you have to put all the files in the drive with a maximum size which will depend on the space you have in that drive.
- So you will have to access the directory ” boot / gryp ” on the USB drive. In this unit you will need to open the file “ cfg ” and look for the line: linux /casper/vmlinuz.efi file = / cdrom / preseed / ubuntu.seed boot = casper quiet splash.
- At the end you have to create a space and add ” Persistent “, then simply save the file.
- Finally, you need to restart your computer and press the key several times to enter the BIOS. This key may vary depending on your computer. Although it is usually F12.
- The USB drive should be first in the charging order . In case you don't have a drive, your computer defaulted to boot on the hard drive.
- Here you will be able to choose to try Ubuntu without having to install it so that you have a slight idea of how it works and then if you like it, you can install it from this same drive without any problems.
It is not too complicated to learn how to boot my computer from usb or cd/dvd in this way it is possible to install an operating system by formatting it or to solve various problems related to it.


![[Solved] Android App Won't Open Problem](/images/posts/a150cb8db0eb50df4b79257485e3c04c-0.jpg)