A constantly evolving device.
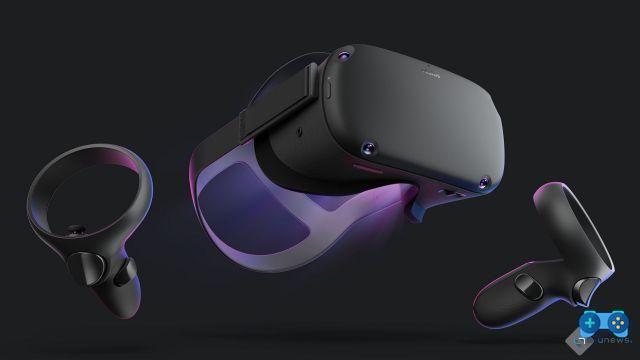
Oculus Quest is probably the most interesting viewer of the moment: the possibility of being able to use it on the move, thanks to the smartphone hardware inside it and which makes it a stand alone viewer in all respects, the good quality of the lenses and above all the recent possibility to use it as a tethered viewer thanks to the Oculus Link functionality, certainly make it an extremely versatile device. The Oculus ecosystem, however, despite the great quality of the content that is added daily, is still very fragmented and restricted. What is present on the “Oculus” App for PC is in fact intended exclusively for Rift and Rift S and the same product is not always available on the Oculus Quest app store and vice versa. Of course, more and more developers are implementing the cross buy between the two devices, that is the possibility of buying the game for one platform and having the possibility to use it also on the other (Here you will find an official page with all the games that support cross buy ) and thanks to Oculus Link, users have the opportunity to play all the titles in the Rift catalog on Oculus Quest. However, many are asking for a greater opening of the store, if only to support even more the exponential growth of the viewer.
Not everyone knows, however, that there is a way to upload to this even Apps not expressly approved by Oculus or not yet, or because they do not meet the standards set by the company for its store. In this video we will therefore see how to use the Sideload software to load non-certified apps on Quest.
Disclaimer: Perform this procedure at your own risk. Sideloading uncertified third-party apps is not risk-free and could render your Oculus Quest unusable if malicious content is installed. Soultricks.com assumes no responsibility in this regard.
- Create an Oculus developer account. From pc go to this address and click on "Create New Organization". Feel free to choose an invented name, it is not relevant. Accept and complete the registration.
- Make sure your Oculus Quest is turned on and connected to the same wifi network that the mobile phone on which you have installed the Oculus app is connected.
- Click on Settings and then connect to your Oculus.
- When the indicator turns green, confirming the connection with the viewer, click on More settings and then on Developer mode and activate the switch.
- Once this is done, you need to install the drivers and software that allow the viewer to be connected to your PC. Download the installer from this address that you find at this address by clicking on XDA Mirror. It is a self-extracting executable and to install it just follow the instructions on the screen (Y 3 times)
- Connect your Oculus Quest headset to the PC via a data cable.
- Once connected to the PC, a message “Allow USB Debugging” should appear on the screen of your viewer. Check the item "Always consent from this PC" and then consent. If the message does not appear it is probably caused by an error in the installation of the adb drivers or in any case by a problem related to the drivers.
- Still with Quest connected to the pc with a data cable, start a command prompt or a Powershell instance as administrator and type adb devices.
If everything has been done correctly you should see your Quest serial. If the command does not start, type cd c: adb (or the folder where you installed adb). From here type the command .adb devices - At this point you are ready to install your apk. If you are in the adb directory, use the command .adb install filepath (taking care to replace filepath with the place where you installed your apk (you can find many at this address)
- Once the installation has started it may take a few minutes or a few seconds depending on the size of the file. During this phase in the Powershell you will read Performing Streaming installation and once the installation phase is completed the entry Success.
- Go back to your Quest and the apps will be waiting for you in the “Unknown Sources” section.
Keep in mind that if you have updated to the new version of the graphical interface (the one introduced with the new firmware 16) there will no longer be the Unknown Sources item in the main screen. To find them click on "all applications" from the drop-down menu at the top right, scroll to the end and you will find Unknown Sources. From the settings, however, you can always go back to using the old interface, the adoption of the new one is in fact optional.
If you liked our guide, we invite you to subscribe on our social channels to discuss VR, video games and technology with us and to be updated with new guides and articles on the subject.
Facebook
Telegram
Youtube
Instagram
Twitter