Virtual Desktop, the perfect app for Oculus Quest
Half Life Alyx is the game of the moment: Valve after 16 years of waiting has finally released a new chapter of one of the most acclaimed games of all time, creating perhaps the first real Killer App, or rather, the first System Seller for viewers of virtual reality.
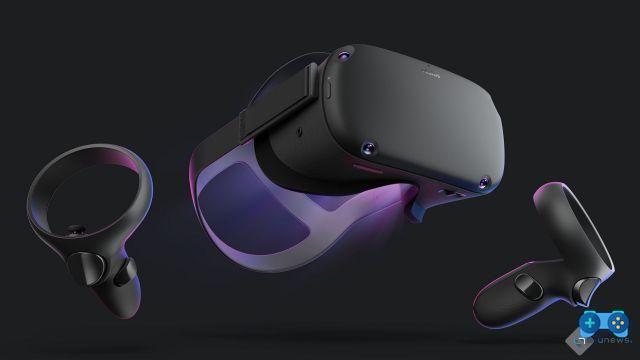
In order to play Half Life Alyx, however, it is not necessary to purchase the highly advanced and expensive Valve Index proprietary headset. In fact, to enjoy the new Valve title in an excellent way, it is sufficient to have Oculus Quest, the stand alone viewer of Quest. Indeed, to say it all, even if it does not have the same 1: 1 tracking of Valve Index, the Quest has the enormous advantage of being a stand alone viewer, that is, able to work even without a direct connection to the PC, to difference of Valve Index, Oculus Rift S etc.
But how to use SteamVR and Half Life Alyx in wireless mode also on the Oculus Quest?
In this guide we will explain how. If you want to know how to connect your Oculus Quest to your PC and use Steam VR via cable, we refer you to this article.
Preliminary requirements:
- A PC with the minimum specs to run Half Life Alyx:
Operating System: Windows 10
Processor: Core i5-7500 / Ryzen 5 1600
Memory: 12 GB of RAM
Video Card: GTX 1060 / RX 580 - 6GB VRAM
a dual band wifi router with 5ghz connectivity; although not strictly necessary to make a stable and fast connection to the network, a dual band router is recommended. The PC must be connected directly to the router, preferably via a LAN cable.
- A smartphone with the Oculus app installed.
- Virtual desktop. The application can be purchased at a cost of € 19,90 from the store directly from your viewer. Virtual desktop is compatible with a large number of titles in addition to Half Life Alyx, at this link below the always updated list of titles compatible with Virtual desktop.
- SteamVR downloaded to your PC. For convenience, if you haven't already created an icon on the SteamVR desktop it will be easier to launch later. https://store.steampowered.com/app/330050/Main_SteamVR/
Procedure
- Turn on your headset and purchase the application from the Quest store Virtual desktop at the price of 19,99 euros. Install it.
- Create an Oculus developer account. From a pc type this address https://dashboard.oculus.com/my-apps/116075916710278/ and click on “Create New Organization”. Choose a fancy name, it is not relevant. Accept and complete the registration.
- Make sure your Oculus Quest is turned on and connected to the same wifi network that the mobile phone on which you have installed the Oculus app is connected. For this application you will need a 5ghz connection. If you don't have a dual band router yet, go for this great value for money TPLINK Archer C7 AC1750.
- From the Oculus app on your mobile, click Settings and then connect to your Oculus.
- When the indicator turns green, confirming the connection with the viewer, click on More settings and then on Developer mode and activate the switch making it turn blue.
- Once this is done it is necessary to install the drivers that allow the viewer to be connected to your PC. Download the ADB drivers from this address https://developer.oculus.com/downloads/package/oculus-adb-drivers/. Unzip them in a folder of your choice and then right click on the "android_winUSB.inf"; from the drop-down menu select Install and wait for the installation confirmation message.
- Connect your Oculus Quest headset to the PC via a data cable (the one supplied should also be for you).
- Once connected to the PC and worn, the message "Allow USB Debugging". Check the item "Always consent from this PC" and then you agree. If the message does not appear it is probably caused by an error in the installation of the adb drivers or in any case by a problem related to the drivers. In this case, try one of the solutions we have indicated in the troubleshooting section below.
- Go back to the PC and download and install the Sidequest software for Windows 10 from this address https://sidequestvr.com/#/download.
- With your Quest connected to the PC, start the software you just installed; at the top of the window, the program should notify you of the correct connection to your headset. Click on GAMES & APPS and in the left bar of the site, from the “Streaming” menu, click on the Virtual Desktop image and then on “Install Latest”. If you start a Sidequest instance, of course, you agree. Wait for the download and installation to complete (at the top of the Sidequest program top bar you can check the activities and completion of the installation (this may take a few minutes).
- Finally, go to the Virtual Desktop site https://www.vrdesktop.net/ for the last step. Download and Install the Virtual desktop streamer application on your PC taking care to use, during installation, the user name used to access your Oculus Quest and your mobile app.
You are now ready to launch Virtual Desktop wirelessly. Put on the headset and from your Oculus library start the Virtual Desktop software you previously installed. Connect to your PC by clicking on its icon from the “Computers” page of the application.
Now you are connected to your PC, it remains only to start SteamVR from the shortcut you previously created on the desktop and finally choose from your library Half Life Alyx. If you have done everything as described, at the next launch you will also find an icon for Steam vr and for all games started at least once, directly within the Virtual Desktop application under the games menu, accessible via the Oculus button on your controller.
ENJOY!
Troubleshooting
The most frequent error in Quest sideloading is related to ADB drivers not recognized by the system. This makes it impossible to set the debug mode on the Quest, which we remember has an operating system based on Android.
If you don't get the message Enable Debug mode (remember to select "always allow from this device" when it appears on your viewer) here are some attempts you can make to try to enable this mode.
- Try a different cable or a different USB 3.0 port. Also try a cable that cannot be used with Oculus Link, as long as it is a USB 3.0 cable.
- look for the folder.android (it should be in the root directory) and copy it to another location (for backup) and retry installing the ADB drivers. This should clear the cache of any previous ADB keys.
- Turn on and connect your quest to the PC via USB cable; from the pc, open an instance of powershell or a command prompt window in administrator mode directly from the folder where the drivers downloaded from the Oculus site are installed (see point 6) and launch the adb devices command, checking that the device is recognized. Go back to your Quest to check that the Enable Debug popup is off.
- This method, initially intended for the installation of VRidge (an independent software that allows you to use applications and games not expressly designed for vr with all or almost all viewers in circulation, and also to stream from PC to Quest just like Virtual Desktop , it seems to have worked because it forces the activation of the ADB drivers.
(WINDOWS 10 only) Open a poweshell window or command prompt in administrator mode and copy the following script in full:
<
p style = ”text-align: justify;”>
Add-Type -AssemblyName System.Windows.Forms
Set-Location $ env: TEMP
if (-Not (Test-Path "vridge-preview-installer"))
mkdir "vridge-preview-installer"
}
Set-Location vridge-preview-installer
Write-Output "Downloading vridge.apk. This should take less than a minute."
$ latestURL = (Invoke-WebRequest -Uri "https://go.riftcat.com/VRidgeQuestPreview" -MaximumRedirection 0 -ErrorAction SilentlyContinue) .Headers.Location
Start-BitsTransfer $ latestURL -Destination vridge.apk
if ($ null -eq (Get-Command "adb.exe" -ErrorAction SilentlyContinue)) # checks that adb isn't already availible
if (-Not (Test-Path adb.zip))
Write-Output "Downloading ADB. This should take less than a minute."
Start-BitsTransfer "https://dl.google.com/android/repository/platform-tools-latest-windows.zip" -Destination adb.zip
}
if (-Not (Test-Path .platform-toolsadb.exe))
Write-Output "Unpacking."
Expand-Archive adb.zip -DestinationPath.
}
$ env: path + = "; .platform-tools" # adds the downloaded adb to the PATH for this session
}
Write-Output "Testing if Quest is connected."
$ deviceStatus = adb.exe devices -l | Out-String
if ($ deviceStatus.Contains ("Quest"))
if ((adb.exe shell pm list packages com.riftcat.vridgeoculus.beta | Out-String) .Length -gt 0)
Write-Output "Unnstalling current version."
adb.exe uninstall com.riftcat.vridgeoculus.beta
}
Write-Output "Installing."
$ installResult = adb.exe install vridge.apk | Out-String
if ($ installResult.Contains ("Success"))
[System.Windows.Forms.MessageBox] :: Show ("VRidge for Quest preview installed.", "Success", "Ok", "Information");
}
else
[System.Windows.Forms.MessageBox] :: Show ("Unexpected error during installation. Please contact [email protected]", "Error", "Ok", "Error");
}
}
elseif ($ deviceStatus.Contains ("unauthorized"))
[System.Windows.Forms.MessageBox] :: Show ("Your device is connected but you need to confirm the developer prompt inside the headset first. Please put on your headset while the device is connected and confirm the connecion in VR, then paste this script again. "," Error "," Ok "," Warning ");
}
else
[System.Windows.Forms.MessageBox] :: Show ("Quest connection not found. Please make sure it's connected properly through USB, then paste this script again.", "Error",
"Ok", "Warning");
}
Go back to your Oculus and accept the Debug request.
If you also want to install VRIDGE once Debug has been enabled, go back to the PC and run the previous script again. You will find the application in "unknown sources" directly in your Quest.