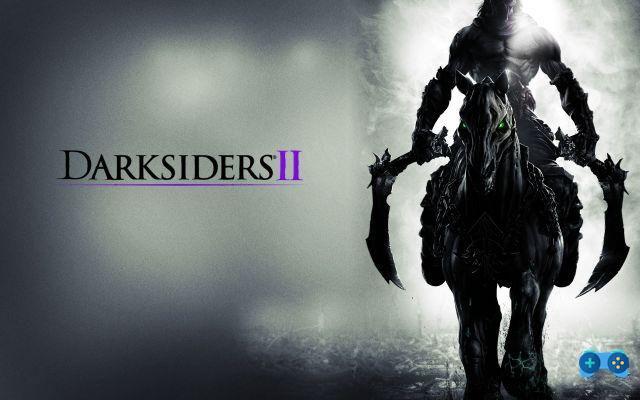
 Secrets of Death Revealed.
Tested version Personal Computer, Playstation 3, Xbox 360.
After the review of Darksiders 2, a collection of secrets and tricks regarding Death could not be missing.
The Guide will be divided into secondary missions, tricks, finding rare and collectible items and a video where he will show you how to overcome the maze unscathed.
Happy reading.
Secondary Missions
During the Darksiders 2 adventure, you will meet several secondary characters who will ask you for help. These quests will reward you with rare items, experience points and if completed they will unlock some trophies / achievements for the PS3 and Xbox 360 versions.
Below you will find a list of side missions and with a short caption that will allow you to understand how to complete them:
Thane side quests
"Kill Gorwood, Kill Bhelithir, Kill Achidna, Kill the deposed King"
In Tri-Stone Challenge After challenging and winning the challenge with Thane, he will ask you to kill four ancients. The ancients will be easily found as they are secondary bosses of some main dungeons. I recommend you face the secondary bosses from level 15 onwards, as they are very tough.
"Spark of life"
Reward: XP and gold
After getting the scroll from the angel Nathaneil when you go to Lostlight. Bring one of the scrolls to Muria and she will give you this quest for The Scar dungeon. It is at the bottom south of Charred Pass. To complete the mission, you will have to kill Ghorn. I recommend you go there from level 15.
Alaya side quests
"The Hammer Forge"
Reward: XP and gold
After cleaning up Drenchfort and restoring the forge operation, you will need to speak to Alaya for the following quest. The aim will be to retrieve the Hammer of the Forged inside the Forge. Completed the quest you will be rewarded with a lot of XP and 2000 gold.
Vulgrim secondary mission
"The Book of the Dead"
Reward: Access to Tombs containing Legendary items
This side quest will be delivered to you by vendor Vulgrim who will ask you to find the 40 pages of the Book of the Dead. The pages of the Book of the Dead are scattered throughout the game zones and in the dungeons.
Blackroots side quest
"Stone on Stone"
Award: Guillotine
When you first arrive at the Fjord, you will encounter Blackroots. This ancient will ask you to recover some stones scattered around the various game worlds. Stones are divided into three types (Power: Red, Mystical: Blue, Resistance: Green). These stones can be recovered as the adventure progresses. Note that the stones can be scattered in the outer worlds but also in the dungeons.
Oran side quest
"Wandering stone"
Reward: XP and gold
To call this character back to you, you must first obtain the "creator's key". Obtained the key, you will have to go to wake Ogre and at this point he will ask you to recover four limbs. The limbs will all be found in the moor.
"Lost Relics"
Reward: Abyssal Gloves
To complete the following quest, you will need to meet Ostegoth for the first time when the tree of life takes you to the Kingdom of the Dead. Ostegoth will be the first PC you see and will give you the quest for the relics. In total you will find three series of relics for a total of 30 relics to be delivered.
Relics will be found in the realm of the dead, in heaven and hell!
Chancellor side quest
"Chancellor's Quarry"
Award: Pillager
The angel Nathaniel in Lostlight, will give you two scrolls, one of them is for the Chancellor of the Eternal Throne (see secondary quest below). Once the parchment is delivered, he will ask you to solve the Soul Arbiter's Labyrinth (you will find the video below). To complete the maze, you'll need to find 20 scrolls and defeat the Soul Arbiter boss.
Nathaniel secondary mission
"The lost soul"
Reward: XP and gold
As with the previous secondary quest, the angel Nathaniel in Lostlight will give you two scrolls. As with the previous mission, to complete this secondary mission you will need to bring one of these scrolls to the Chancellor of the Eternal Throne.
Uriel secondary mission
"Light of the Fallen"
Award: Sunder
When you are on Earth talk to Uriel and she will tell you about her fallen comrades who are being tortured. He will ask you to release them from their condemnation. The fallen angels are in total 10 and will be visible along the linear path of the main quest.
Unlockables and legendary items
For the recovery of all the special weapons of Death, it is necessary to travel to every remote corner but not only, also to eliminate some hidden boss fights or in particular ways.
Below I leave you a list of weapons and unlockables (secret treasure chests) and their location.
Chaos Fang Scythe
Have a game file saved with completed Darksiders on your hard drive or one of the achievements for completing Darksiders on your profile. Then, look for Mryia the Shaman (dressed in blue) in the eastern part of the Tri-Stone. Talk to us to get Level 1 of the “Chaos Fang” Legendary Weapon.
Epaulet of the Horseman
Have a game file saved with completed Darksiders on your hard drive or one of the achievements for completing Darksiders on your profile. Then, look for Mryia the Shaman (dressed in blue) in the eastern part of the Tri-Stone. Talk to us to get Level 5 Shoulder Armor 'Epaulet of the Horseman'.
LEGENDARY OBJECTS, LOCATION:
Legendary Scythes
Barbed Defilers
Area: The Crucible
Successfully complete Waves 51-75 of the Crucible.
Bheithir's Talons
Area: The Nook (Optional)
Defeat the Boss Nook.
Black Demise
Area: Arbiter of Souls Crack
Find the secret treasure in the fifth level and find all the Sacred Tomes.
Demonflame Renders
Area: The Black Stone - First Floor (First)
Search for a room after leaving the large main chamber where you encounter 2 new types of enemies (the Champion and the Soldier). Inside the large circular chest in the east region of the maze, drop down to the lowest grabbable ledge and circle around to find a hidden path. Then, go down and up the wall to find another secret area where the weapon is placed.
GnoMAD Sickles
They are automatically given to you for finding all the GnoMAD Gnomes.
Goldbringer
Area: The Cittadella Avorio - Second Floor
In the open courtyard on the south section of the map, you will have to solve a puzzle to continue to the aqueduct. In the same area, there are Corruption crystals hiding a switch. Destroy the crystals and press the switch to open a gate. Instead of leaving, go down the hill with the switch and reach the end of the aqueduct to find the weapon.
guillotine
Area: The fjord
Successfully complete the Blackroot's Stonebite side mission to unlock the weapon.
Lifebane
Area: The Veil
This can only be unlocked during your second game. In New Game mode, defeat the Ice Guardian to unlock this weapon.
Static Blades (Pre-Order Only)
Area: The Eternal Throne
This can only be unlocked during your second game. In New Game mode, successfully complete Draven's side mission to bring back the Bloodless Talisman and obtain this weapon.
Legendary Secondary Weapons
Absolution
Area: The Fountain of the Souls
Defeat the boss Absalom.
Achidna's Fangs
Area: Psychameron
Defeat the boss Achidna.
Aftermath
Area: The Crucible
Successfully complete all 100 waves in one session.
Dark Avenger
Area: The Cauldron
Defeat the boss Gharn.
Executioner's Hook
Area: Arbiter of Souls Ravine
Defeat the Arbiter of Souls boss.
Fists Of Elhazar
Area: Ground - First Floor
After colliding with Noss and escaping into the underground tunnels, you will find yourself inside a destroyed hotel. Look for a room with a mound of garbage. Inside, search and jump to find a hidden alcove with the weapon.
Gauntlets Of Savagery (Pre-Order Only)
Area: Tri-Stone
Successfully complete the side mission in the DLC for Karn.
Gorewood Maul
Area: The Weeping Precipice
Defeat the Gorewood boss.
Lich Spines
Area: The City of the Dead - First Floor
After leaving the central area and moving through the statue room with the puzzle you still can't solve, you will enter a room through the north door. Inside the corridor, use the ledge to reach a handhold. You will need to use a 180 leap and run along the die to reach the high ledge to find the weapon.
Mace Of The Everflame
Area: The Black Stone
Defeat the boss Samael to unlock in New Game Mode.
Masher Of Karkinos
Area: The Drenchfort
Defeat the boss Karkinos.
Mortis
Use the downloadable code that comes with the Darksiders 2 short story to unlock it.
Omega Blades
Area: The Destroyed Forge - Second Floor
Pass the constructs and then swim down the underwater passage. You will arrive that you will have to contend with some Shadow Bomb positions. Find the first in the area, then return to the previous room to destroy some corrupted crystals. The weapon is in the crystal blocked alcove.
Scepter Of The Deposed King
Area: Lair Of The Deposed King
Defeat the boss Argul.
Spear Of Storms
Area: Punta dell'Ombra - Tomb of Death 4
It is located inside the Tomb of Death 4. You will need to collect 40 Page of the Dead and bring them back to unlock this optional area.
Sunder
Area: Earth
Talk to NPC Uriel after finishing their side quest.
Legendary Talismans
Assassin
Area: The Crucible
Successfully complete Waves 76-100.
Blade Master
Area: The Nook - Tomb of Death 2
It is located inside Death Tomb 2. You will need to collect 20 Pages of the Dead and bring them back to unlock this optional area.
Demonheart
Area: Lair Of The Deposed King - Tomb of Death 2
It is located inside Death Tomb 2. You will need to collect 20 Pages of the Dead and bring them back to unlock this optional area.
Elemental
Area: The Crucible
Overcome the final challenge at Wave 101.
Grim
Area: Tri-Stone
Successfully complete the Shaman's Forge on a side quest for Muira.
Heartstone
Area: The Crucible
Successfully complete Waves 1-25.
Hoardseeker
Area: Lostlight - Tomb of Death 3
It is located inside Death Tomb 3. You will need to collect 30 Pages of the Dead and bring them back to unlock this optional area.
Keen
Area: Boneriven - Burial Passages Area 7
Go through the tunnels of the underground tomb inside Boneriven. In the second of these tunnels, as you enter the room, search the first alcove to your right to find the weapon.
The Crown Of The Dead
Area: The Soul Arbiter's Labyrinth
Defeat the Soul Arbiter at the end of the Soul Arbiter's Labyrinth Maze.
Legendary Armor
Abyssal Armor
Area: The Crucible
Obtain all 40 Pages of the Dead to enter Death Tomb 4. Inside the tomb, destroy all 12 vases to reveal a hidden bib with armor inside.
Abyssal Boots
Area: The Crucible
Successfully complete Waves 26-50.
Abyssal Gauntlets
Area: The Fjord
Collect and give all 30 lost relics to Ostegoth to get the armor.
Abyssal Spaulders
Area: The Crucible
Successfully complete Waves 76-100.
SECRET CHESTS, LOCATION:
Secret Treasure Chest 1
Area: Tri-Stone
Shoot 5 pools at unreachable locations to make a secret chest appear each time. Two are along the main road, another is near Alya's location and the last two are near Muria's location.
Secret Treasure Chest 2
Area: Lost Temple - 1st Floor
In the temple, you will find yourself trapped inside a large circular arena and attacked by Constructs and Sentinels. Successfully complete the combat scenario in less than 5 minutes and a secret chest will appear.
Secret Treasure Chest 3
Area: Foundry - 1st floor
This area appears while you are looking for the second Heartstone. Entering a series of decaying ruins on the east side of the map, search for the west wall to climb to reach a high balcony guarded by the Prowlers. On the balcony, after killing the enemies, destroy all the vases on the balcony to make the secret chest appear.
Secret Treasure Chest 4
Area: Gilded Arena - B3
Destroy all 3 large tombstones, then kill the attacking enemies to make a secret chest appear.
Secret Treasure Chest 5
Area: Land of the Forge - Fjord
Once you have the Soul Splitter, return to the Land of the Forge in the Overworld and check out the Fjord. Search around the East Fort. Split and pass over both pressure platforms. Then, look to the upper balcony for 4 pots. Destroy them to make a chest appear with a secret treasure.
Secret Treasure Chest 6
Area: Ground - 1st Floor (Southwest)
While on Earth, you will encounter a large monster called Noss. Further on in the area, you will encounter a second giant Noss. After defeating the enemy, search for this area. Destroy the 4 mailboxes between the bridge and the subway entrance to make a secret treasure chest appear.
Secret Treasure Chest 7
Area: Ivory Citadel - 2nd Floor
Eventually you will reach a large floating island. The chest can be found when you go around the east side of the island. You will need the Voidwalker before you can unlock this chest. In the citadel, search for a portal to your north and another portal near a Shadow Bomb. Run to the portal away from the Corruption crystals and throw a bomb through the portal to destroy the crystals. The treasure chest is under the crystals.
Secret Treasure Chest 8
Area: Ivory Citadel - 1nd Floor
Near the start, after crossing a long bridge and facing the Corrupted Angel, you will pass a bridge over a small floating island with another Holy Fire Knot. Look for the portal and look over the wall. Destroy the 4 pots that are behind the wall to make a secret chest appear.
Secret Treasure Chest 9
Area: The Black Stone - 1st floor
At the south portal to the future, break all nearby objects to make a secret chest appear. There is another secret chest inside the circular room.
The Referee's Labyrinth
The Referee's Labyrinth can be found in the Lands of the Dead, near the City of the Dead. Inside the Referee's Maze each level has 2 directions you can take. Your aim will be to get out of the Labyrinth and face the Arbiter of Souls, but inside it are hidden rare objects that you can recover thanks to our indications.
Note that by eliminating the Arbiter of Souls, you can keep the weapons and rare items that you will find in the maze but also get the Arbiter's Crown.
Level 1
Next Level: North - West
Secret: South - East
Level 2
Next Level: East - South - North
Secret: North - North
Level 3
Next Level: West - East - North - North
Secret: North - South - East
Level 4
Next Level: East - West - North - South
Secret: West - East - North
Level 5
Next Level: West - West - North - East
Secret: West - North - South
Level 6
Next Level: South - East - East - North - North
Secret: East - East - East - South
Level 7
Next Level: South - West - East - East - East
Secret: South - South - West - North - North
Level 8
Next Level: North - West - North - West - East
Secret: North - South - South - East - North
Level 9
Next Level: East - North - East - North - South
Secret: South - West - East - East - North
Level 10
Next Level: West - East - North - South - West
Secret: North - South - East - West
Location of GnoMADs
The GnoMADs are cute gnomes that you will have to collect to get an achievement / trophy in addition to the legendary weapon. Search the indicated locations to find all 4 hidden GnoMAD gnomes and get the GnoMAD Legendary Scythe and the "Gnomad" achievement:
Gnome 1
Area: City of the Dead - 4th floor
At the northwest balcony, look for a secret passage. You will find it behind a moving rise that you can cling to. Open the door with the switch, turn around and jump to the floor, then jump to the wall and run to the left wall. Return to the hand rack and use Split Soul to step off the nearby pressure plate, revealing a secret room.
Gnome 2
Area: The Ivory Citadel - 3rd Floor
After purifying the pool at the top of the westernmost tower, return to the northern passage that was previously covered in the third floor. To return to the top floor of the tower, follow the aqueduct and climb the wall, but don't enter the door. Instead, I go down from the balcony and climb the tower to the top.
Gnome 3
Area: The Weeping Peak - 3rd Floor
To find the secret area, you need to run to a pressure platform / rising platform in the third floor of the weeping peak. Before the platform there is a portal. Open it, then turn east and use the stairs, turning north and looking for the opening of another portal. Activate it, then return to the previous portal. The two portals should now be connected and you will fall from the portal to a secret room. Inside the treasurer, head to the waters to the north to find a hidden underwater tunner.
Gnome 4
Area: The Black Stone - 1st Floor
Wait until you unlock the door in the past. When you return to the Great Hall, check the north elevation for a hand holder. Go down the hill and return to the present through the portal. In the present, ascend using the hand holder to the north and go through the open door to the west. The Gnome is at the back of the room.
Extras
By completing small objectives, you will be able to unlock Avatar Themes for your Playstation Network profile.
To find out how you will unlock these cute Gadgets look below:
Darksiders T-Shirt: Successfully complete the game on any difficulty.
Darksiders Logo Hat: Defeat the Raven Father.
Mask of Death: Successfully complete The Crucible.
The title is available from August 28, 2012 on the PC, PlayStation 3, Xbox 360 platform