Nowadays it is useful to be able to bring together all the devices you own under a single virtual network, so that you can access them more easily and be able to control them even remotely, without necessarily exposing them to the rest of the world. There are various methods to create a VPN (Virtual Private Network) and, in principle, they are not really within everyone's reach. A few days ago, however, we ran into Zero Tier, an open-source solution that allows anyone to create their own virtual network without having any specific skills, thanks to a very simple wizard and an application that guarantees a totally encrypted and authenticated connection through algorithms such as 256-bit Salsa20 and Poly1305.
The starting point is precisely to create the virtual network that will allow our devices to connect to each other as if they were connected to the same local area network (LAN). To do this you can use the Central controller hosted by ZeroTier at my.zerotier.com, a web-based UI portal for managing virtual networks. To register, simply provide your email and password and, once logged in, you can create your own virtual network, identified by a unique 16-digit ID.
The last step is to install the ZeroTier client on each device you want to connect to the network, with the free membership for non-commercial use, you can connect up to 100 devices to the ZeroTier Central network controller. Virtually all popular systems are supported, including Android and iOS mobile devices and the firmware of various NAS such as Sinology. Once the application is installed, each device will in turn be identified by a 10-digit ID: simply indicate the 16-digit identification of your network to start the automatic configuration.
Configure a standalone network controller
We have tried it and we wanted to go further by trying to take a first step towards a self-hosted solution, by configuring our controller that is not publicly exposed. In this article we will see how to configure your own standalone network controller without necessarily having to go from registering to my.zerotier.com.
Setting up a standalone controller is simple enough: just install the software Zero Nível Um and follow the installation instructions below to install ztncui em uma máquina Linux.
Pré-requisitos
- Ubuntu machine with 1GB of RAM
- open port 9993 if a target node is behind firewall (not required but decreases latency)
Instalação
Let's connect to our Linux machine and start installing the client. Debian and RPM based distributions including Debian, Ubuntu, CentOS, RHEL, Fedora and others are supported via a script that adds the right repository and installs the package. The following command is also shown on the ZeroTier download page zerotier.com/download.shtml.
curl -s https://install.zerotier.com | sudo bash
At this point the Zerotier client will be installed on our machine, now let's add the repository to download Ztncui, i.e. what will be our controller.
curl -O https://s3-us-west-1.amazonaws.com/key-networks/deb/ztncui/1/x86_64/ztncui_0.5.8_amd64.deb
Let's install it with the following command:
sudo apt-get install ./ztncui_0.5.8_amd64.deb
Optional: once ztncui is installed we can install SSL certificates, by default auto-generated self-signed certificates will be used, but you can generate your own by filling them with your personal information using the following commands:
sudo -i
cd /opt/key-networks/ztncui/etc/tls
rm -f privkey.pem fullchain.pem
openssl req -x509 -sha256 -nodes -days 365 -newkey rsa:2048 -keyout privkey.pem -out fullchain.pem
chown ztncui.ztncui *.pem
chmod 600 privkey.pem
We restrict access to port 3443 on the public network interface to our own IP address (at least until the admin password is set).
sudo sh -c "echo 'HTTPS_PORT = 3443'> /opt/key-networks/ztncui/.env"
Having already got a certificate and private key, you should be able to access ztncui over HTTPS on the port specified by HTTPS_PORT.
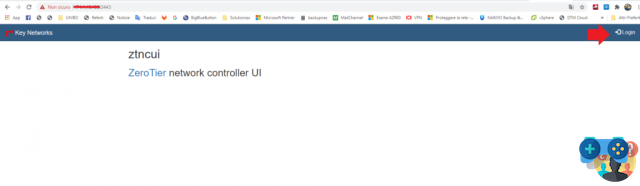
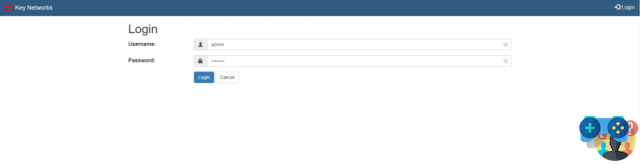
At this point we can use our controller, let's connect via HTTPS on port 3443 via web browser, https: //: 3443
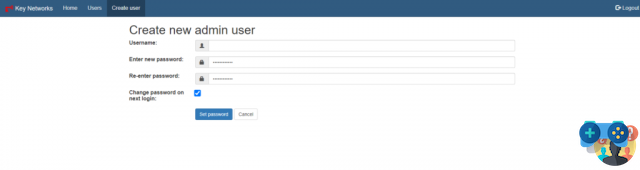
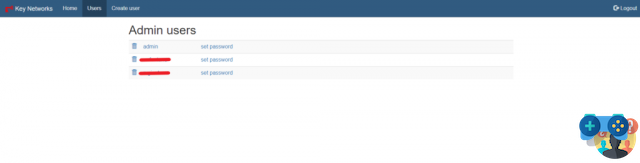
Further users can then be created via the menu User>Create User entering username, password and specifying whether the password will be changed at the first login.
Do cardápio Network it is possible to create the network that will allow us to connect all the remote devices. We click on Adicionar rede and choose a name for our network.

Let's go back to the Home where it is possible to identify the 16-digit ID of the newly created virtual network. By clicking on List all networks on this controller it will be possible to configure our network.
Clique em fácil configuração.
We have the possibility to automatically assign or generate an IP class for the virtual network and set the range of addresses that will be used by the devices we add.
Once confirmed we return to the previous page; clicking on detalhes we will be able to have more information about the newly created network.
Ao clicar em membros we will be able to consult the list of added devices. Obviously the list will be empty.
However, we can add our own controller by typing the command on our terminal:
sudo zerotier-cli join [networkID]
Where [networkID] is the 16-digit code that identifies our network. You can check the connection status with the command:
sudo zerotier-cli status
At this stage an error like “ACCESS_DENIED” is normal, as the client needs to be enabled. So let's go to the section Network>Members of our controller, the ID of the newly added device will be shown to which we can assign a name in order to recognize it more easily. Enabling the flag will authorize the device to become part of our network, we can indeed see that it has been automatically assigned an IP belonging to the pool previously set (it can be changed if desired).
To add the other devices instead, we can always download the client from the ZeroTier Download page. It will be possible to select the icon corresponding to the operating system of the device we wish to add to the network.
For example, if we select Windows we will download the .msi package to be installed directly on the machine. We can also connect mobile devices through the Zerotier One app available on both the Play Store and the Apple Store. The procedure will be similar to the one explained above: install the client, join the network identified by the 16 digits and enable the added devices from the dashboard of our controller. The next image will show the different clients that we added during our test.
From now on, our devices will also be reachable remotely, from any destination using the assigned IPs.
Routing between ZeroTier and physical networks
The fact of having to use IP addresses other than those of the office LAN to identify our company devices didn't excite us, it would have been more convenient to connect to the machines without having to remember all the virtual IPs assigned by the ZeroTier network. So, looking through the documentation we found a way to do it.
The steps to be performed are as follows:
- Install ZeroTier on a Linux machine which will act as a gateway
- Add a new route on our ZeroTier controller
- Ativar encaminhamento de IP
- I will configure iptables
This is a summary table containing the example parameters that we will need for the configuration, to be replaced with your configuration.
| Informação | EXEMPLO | Variável |
|---|---|---|
| Network ID ZeroTier | 865e7201263ef8e07 | $NETWORK_ID |
| Name interface ZeroTier | zt7nnig26 | $ZT_IFACE |
| Physical Interface Name | eth0 | $PHY_IFACE |
| Subnet di ZeroTier | 10.100.10.0/24 | |
| Subnet Physics Office (Target) | 192.168.1.0/24 | $PHY_SUB |
| ZeroTier Gateway IP address | 84.100.10.100 | $ZT_ADDR |
1.Install ZeroTier on a Linux machine which will act as a gateway
Within the LAN network it will be necessary to configure an Ubuntu machine, install the ZeroTier client and add the machine to the virtual network by enabling it to obtain an IP, as shown above.
In our case the controller itself is part of the physical network so we will use that same machine as a "router".
2.Add a managed route to the ZeroTier network on our controller
In this step we will add another route for any device connected to the ZeroTier network. Let's go to Network>details as shown above and then click on rotas.
The page will show the current existing route, created by default when creating the virtual network. We will add a new one by setting as alvo the IP class that identifies our corporate physical network and how Gateway the virtual IP address of the linux machine. It is recommended to configure the target class with a slightly larger subnet than the actual physical subnet, so that devices located on both the physical and virtual networks of ZeroTier still prefer the physical connection. In our example our internal lan is 192.168.1.0/24 so we will set 192.168.1.0/23 instead of /24 (a smaller number is a bigger subnet in this notation) while the virtual IP of the gateway, as well as our controller , is 84.100.10.100.
Clique em Enviar and the new route will be added to the list.
3.Ativar encaminhamento de IP
At this point let's connect to the Linux terminal and edit the file /etc/sysctl.conf usando o comando
sudo you /etc/sysctl.conf
and uncomment the line for net.ipv4.ip_forward eliminando #. We save and close the file by pressing Esc e digitando : qq! followed by the confirmation enter key.
Forwarding will be enabled at the next restart of the machine, to enable it immediately type the command:
sudo sysctl -w net.ipv4.ip_forward=1
4.Configure iptables
Also from the Ubuntu shell we assign two variables that will make subsequent commands easier for us. The values assigned correspond to the 2 network interfaces of the machine, to display them key in ifconfig via shells; you will get something like eth0 and ztnnig26. We set the variables with the following command:
PHY_IFACE=eth0; ZT_IFACE=zt7nnig26
Let's add the rules to the ip tables:
sudo iptables -t nat -A POSTROUTING -o $PHY_IFACE -j MASQUERADE
sudo iptables -A FORWARD -i $PHY_IFACE -o $ZT_IFACE -m state --state RELATED,ESTABLISHED -j ACCEPT
sudo iptables -A FORWARD -i $ZT_IFACE -o $PHY_IFACE -j ACCEPT
We also save the rules for the next boot
sudo apt install iptables-persistent sudo bash -c iptables-save > /etc/iptables/rules.v4
Teste!
Now all that remains is to test the configuration;
- Connect the pc to another network (different from the newly added LAN)
- Add it to the zerotier network and enable authorization
- Try to access some LAN network machine that you added earlier using the IP of the physical network
Conclusões
Obviously ZeroTier offers much more than what is described in this article, just consult the manual to realize its potential. Let's say that, after reading the manual, we decided to try to get a self-hosted solution by deciding to present this interesting product through a quick guide. We also had excellent impressions regarding the connection speed, comparable to that of our point-to-site VPN that we usually use.
Obviously what is shown in this article is only a first step towards having a completely independent infrastructure. At the moment, however, the 4 zerotier root servers located in different geographical areas are used to establish connections between the different peers. The current version of zerotier would allow you to create your own root servers but this feature is still considered somewhat experimental, so we decided to stop there for the moment given the imminent arrival of version 2.0. So we just have to wait for the arrival of the new version to find out if there will be interesting news.
NB For more critical situations, where, for example, confidential data or particular equipment is involved, it is better to focus on VPN solutions managed entirely in-house rather than third-party software. If you need to know the best solution for you, please contact us!
Links úteis
https://www.zerotier.com/manual/
https://zerotier.atlassian.net/wiki/spaces/SD/overview
https://www.zerotier.com/2019/09/24/zerotier-2-0-status/
https://key-networks.com/ztncui/


![[Resolvido] O aplicativo Android não abre o problema](/images/posts/a150cb8db0eb50df4b79257485e3c04c-0.jpg)